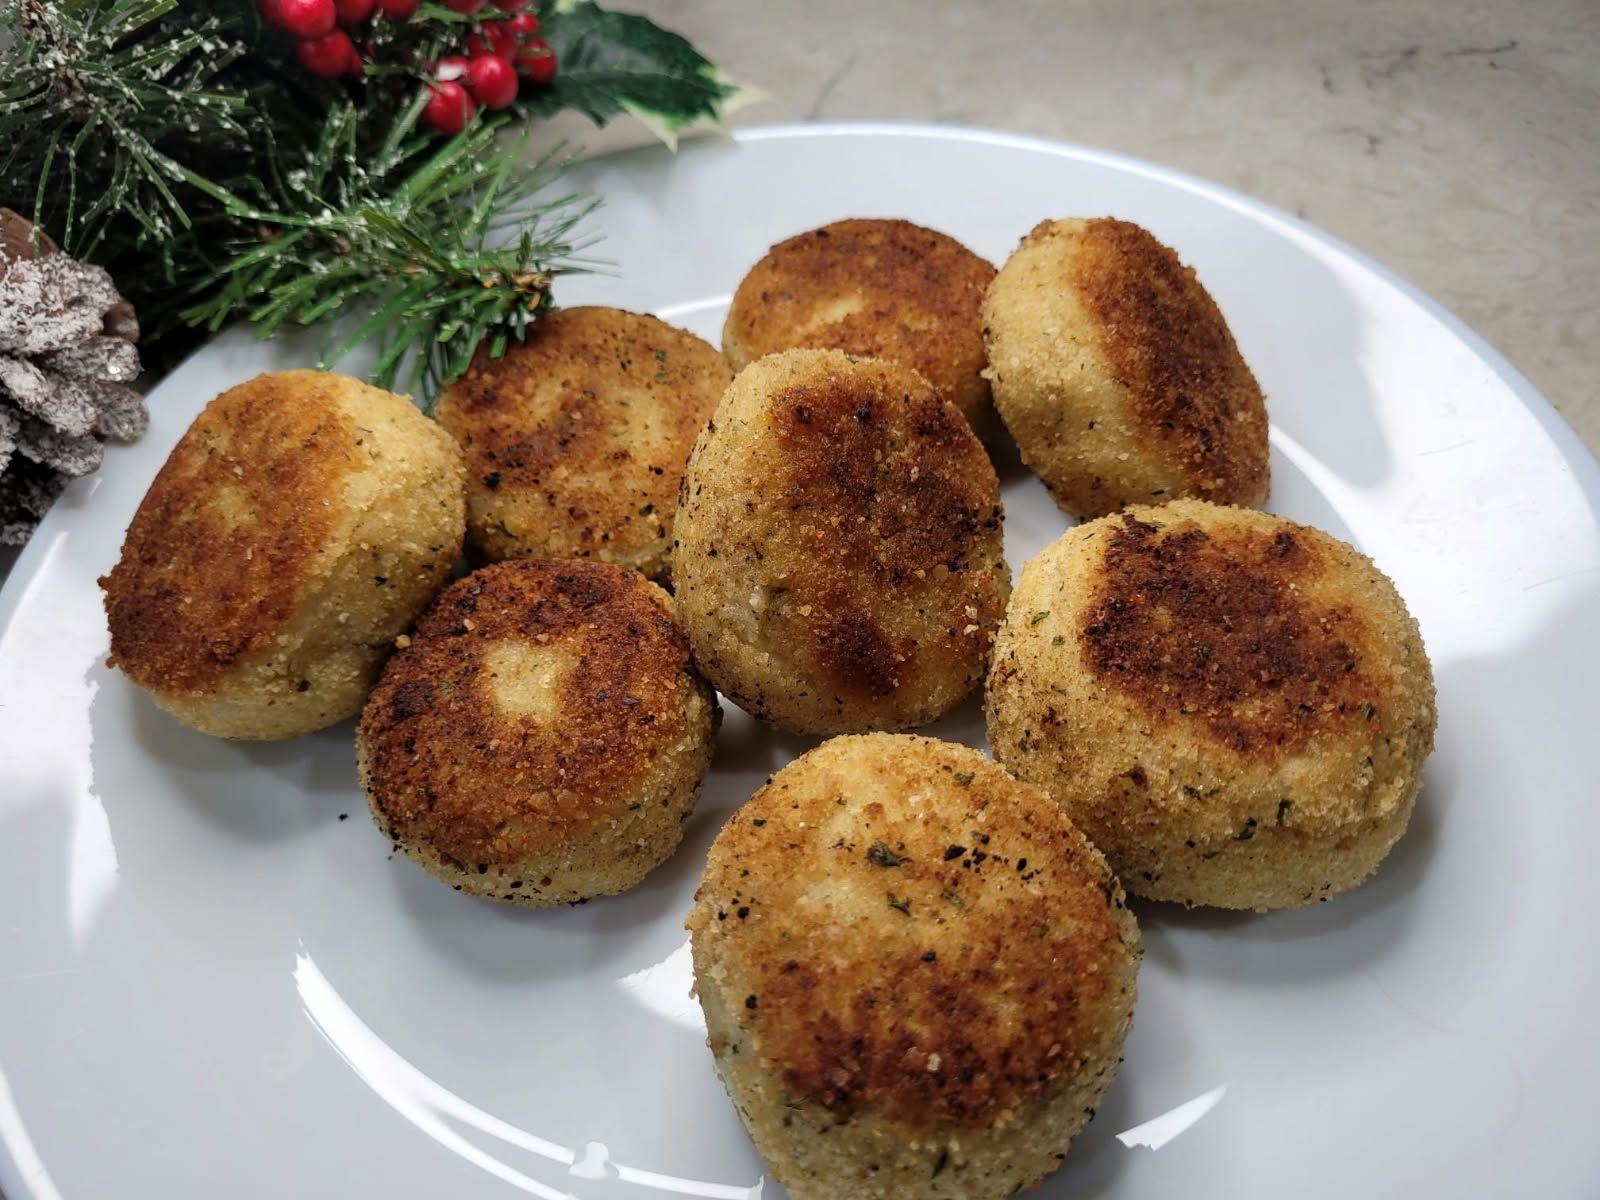
Cooking hack: Tips for soft parathas

Parathas are griddle fried, Indian flatbreads. These unleavened breads are easy to make and are a favorite in our home. Made with whole wheat, water, and ghee/olive oil for a vegan alternative, it’s a healthy and delicious alternative to store bought flour tortillas or rotis.

When we got married, Nilesh remembers waking up every morning where the aroma of ghee beckoned him to the kitchen. There the cook barely kept up rolling out parathas as Nilesh would wolf them down as soon as they came off the tava/pan.

Today, the kids and Nilesh relish it anytime of the day – with scrambled eggs for breakfast, rolled up with jam and cheese as a snacks, or for lunch and dinner accompanied with curries.

Making them doesn’t really take much time. And they are so delicious, shape doesn’t really matter. You will need a rolling pin, a pan or griddle to cook it on, whole wheat dough, a dash of salt, olive oil or ghee and you are ready to go.

Here is the recipe along with tips to make them soft.

Warm water: use lukewarm water to knead the dough. Add water in batches. Knead gently. Dough should not be too soft or too firm.

Ghee or olive oil: a tablespoon of warm ghee or olive oil added while kneading not only gives it a different aroma, but will make it softer.

Cover the dough and let it rest: after kneading the dough, cover it with a damp cloth and let it rest for 10-30 minutes. Not only will it keep the moisture in, it allows the dough to rise slightly the dough should be semi soft

Add milk or yogurt: adding room-temperature yogurt or warm milk while kneading, enhances the texture and makes and keeps the parathas soft

Rolling the parathas: parathas should be rolled slightly thicker than chapatis

Stove temperature: don’t cook them on too low or too high a flame. Cook on medium flame and add ghee when you see brown spots on the paratha and lower the flame to complete cooking. Move the paratha around on the tava and keep applying a little pressure with the back of a spoon or spatula to cook evenly.


Parathas – Indian unleavened flatbreads

Pronounced pa-ra-thas, these delicious, healthy, flaky, unleavened Indian flatbreads, are made with whole wheat flour. These are best enjoyed warm with curries, lentils or vegetable dishes. They are also a good alternative for tortillas and wraps.

The word paratha is the combination of the words ‘Parat’ meaning layers and ‘Atta’ meaning dough. It translates to layers of dough that are cooked.

When making parathas, the dough in layered onto itself before it’s rolled into a triangle on a lightly floured surface. The rolled dough is then cooked in a hot tava (griddle) while brushing ghee or alternatively, olive oil, toasting until both sides have golden brown spots and crispy. The longer you cook, the crispier they get. Follow these tips to make perfectly soft parathas each time.

These parathas are great for curries, rolled up with jam or jam and cheese, or chutneys. In our home, they are a welcome alternative to bread for breakfast.

Servings: 8 parathas

Time: 40 minutes including resting time

Equipment: large mixing bowl, rolling pin (and surface to roll it on), tongs/flipping spatula, tava or griddle

Ingredients:

  • 2 cups whole wheat flour (atta…available in Indian stores)
  • 1 to 1.25 cup of water (as needed)
  • 5 tablespoons ghee or oil (to add to the dough as well as during roasting)
  • 3/4 cup dry flour for dusting during rolling
  • 1/4 teaspoon salt

Instructions

  1. Add 2 cups of dough, 2 teaspoons of the ghee/oil and salt to the mixing bowl
  2. Slowly add water in batches, while kneading the dough in either a dough mixer or by hand to make a firm dough. I usually use a 2:1 ratio or flour to water
  3. If the dough is too difficult to knead then add drops of water at a time, until it is soft and pliable
  4. Cover with a damp cloth and set aside for atleast 20 minutes
  5. Now divide the dough into 8 equal parts and roll each part into a ball. Keep the balls covered with the damp cloth as you roll each one out
  6. Lightly flour the rolling area and place a ball of dough on it. Roll the dough into a circular shape with the help of the rolling pin
  7. Smear a little ghee on the paratha evenly with the back of a teaspoon. Then fold into half. Now smear the semi-circle with a little ghee again, then fold into half, forming a triangle. Lightly sprinkle flour on both sides
  8. Sprinkle flour on the rolling surface and lightly roll out the folded paratha. Don’t make it too thin. While rolling this, heat the griddle on a medium flame. I usually roll 3-4 parathas while the griddle heats up, keeping the rolled parathas aside, ready to cook
  9. When the griddle is hot, place a paratha on it. Soon it will start to puff. Manage the heat, too hot and it will burn, too low a flame and the paratha will be too hard
  10. When the paratha puffs, flip it over. On the slightly cooked side, smear ghee with a teaspoon, spreading it evenly. Gently press the paratha with a spatula enabling it to cook evenly. You will see brown spots as it cooks Flip the paratha and add ghee to the other side. You will see it puff and the layers separate. You will continue to see brown spots. Flip as needed, cooking while more brown spots form
  11. Remove from heat and stack in a closed container so parathas remain soft and warm
  12. Repeat the process to cook the rest of the flatbreads
  13. Eat warm with curries, lentils or sauteed vegetables. Roll it with jam or chutneys. If stored, warm on the pan later. If you warm in a microwave, cover with a damp paper towel to maintain softness

Steps in pictures

Knead the dough and let it rest while covered with a damp cloth. Then divide into 8 equal portions and roll each portion into a ball.
Take one of the eight dough balls and roll into a circle
Add flour to the rolling surface so the paratha doesn’t stick to the surface.
Smear the semi circle with ghee and fold again to form the triangle. Dust lightly with flour on both sides
Roll the triangle out gently ….make sure it’s not too thin
Smear with ghee and fold into half
Cook on medium flame, smearing with ghee and flipping until the layers separate and brown spots form on both sides


Kheema – ground turkey, beef or chicken

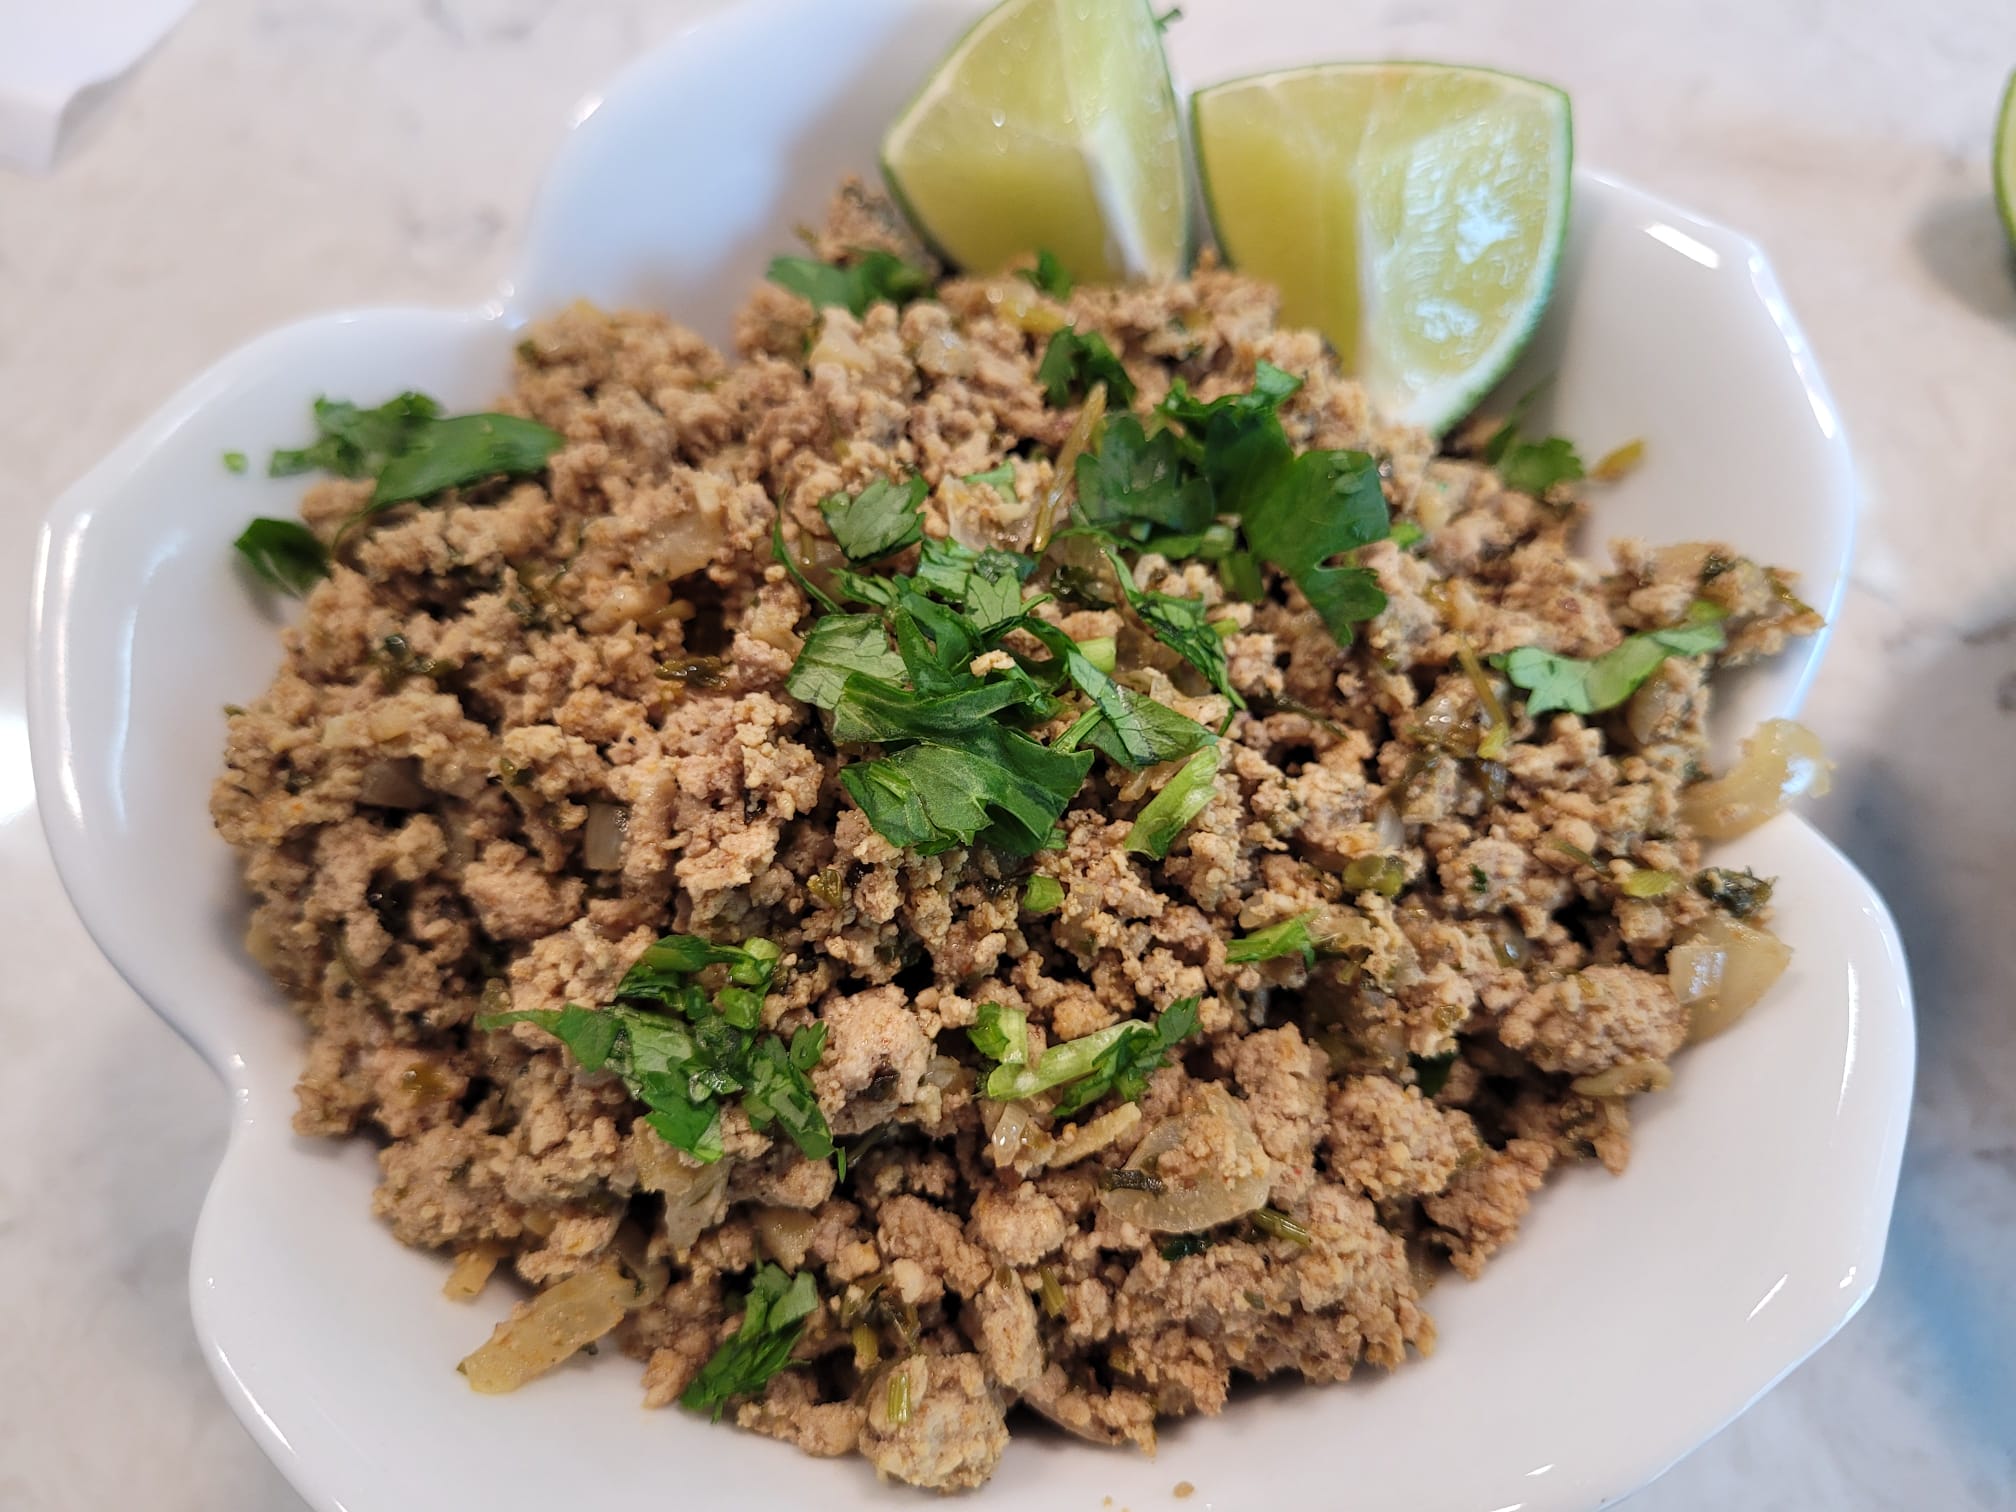
Kheema is a staple Indian dish and just so versatile. Nilesh, as a bachelor, made a huge pot of kheema and had it with pasta, with chapatis, or rice..he almost always seemed to be having kheema for a meal. Now we also use it in patties, empanadas, shepherd’s pie, and potato chops. Make a large pot and then package it into ziplock bags, frozen for another day and another dish!

This is my mum’s recipe. The secret ingredient which made her dish stand out was the addition of vinegar and sugar! You won’t be disappointed.

Servings:6

Ingredients:

  • 1 lb ground turkey (or other meat – cooking time for non turkey options will vary )
  • 3 tbsp oil
  • 2 large onions
  • 2 tbsp ginger, minced fine
  • 2 tbsp garlic, minced fine
  • 2 heaped tsp coriander powder
  • 1 tsp black pepper powder
  • 1 heaped tsp garam masala powder
  • 1 tsp chili powder
  • 2 tsp cinnamon powder
  • 3 tbsp apple cider vinegar
  • 2 tsp sugar
  • 2 tbsp kasuri methi (optional)
  • 1/2 cup chopped fresh cilantro

Method:

  • Heat oil in a large pan
  • When oil simmers, add in the chopped onion, garlic and ginger
  • Turn the flame to low and stirring occasionally, let the mix cook 3 minutes until onions are translucent and soft
  • Add spices (except vinegar, salt and sugar) and fry for 1 minute on low flame
  • Add the meat, fry for 5 minutes
  • Add the vinegar, salt, sugar
  • Cook for 15 mins on low flame
  • Sprinkle in kasuri methi and cilantro, stir and cook for another minute
  • Serve hot with chapatis. Use leftovers to make shepherd’s pie or potato chops

Lentils with spinach – dal palak

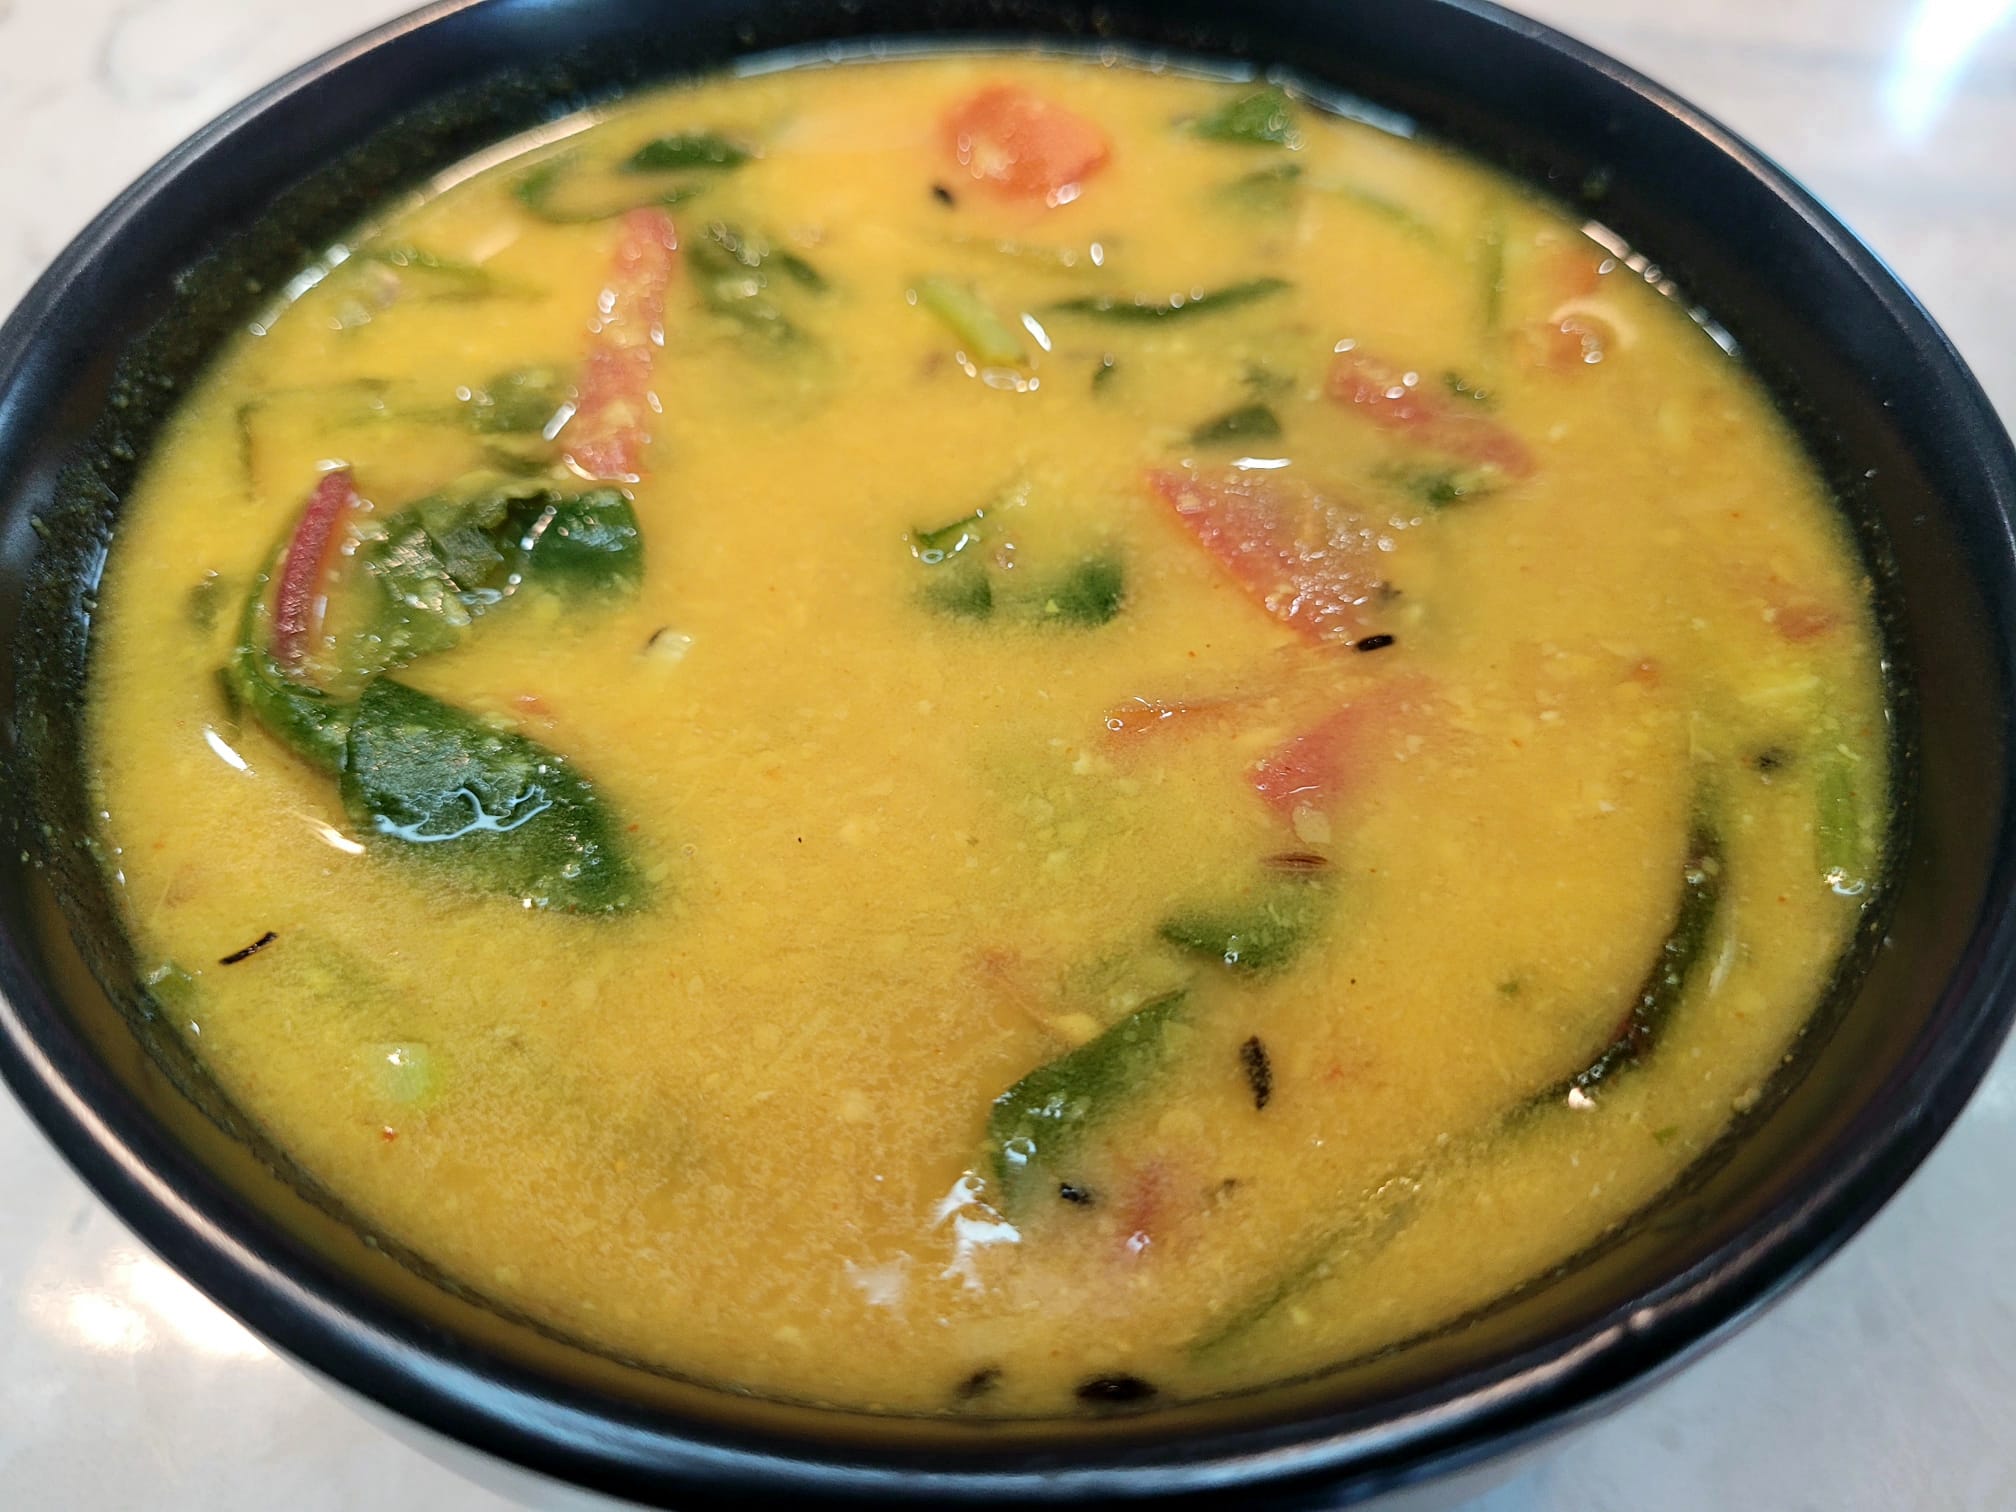
This nutritional lentil dish packs an additional punch thanks to the addition of spinach. It’s vegetarian, gluten free and low fat giving you all the benefits of lentils (good protein, digestive health, weight loss etc.) and spinach (weight loss, eye health, anticancer and immunity boosting). Have it as a soup, over rice or scoop it up with a chapati.

Servings: 4. Time: 20 minutes

Ingredients:

  • 1 cup toor dal (split pigeon peas or yellow lentils)
  • 1 tablespoon ghee (or olive oil)
  • 1 teaspoon mustard seeds
  • 1 teaspoon cumin seeds
  • 5 garlic cloves minced fine
  • 1 tablespoon ginger, diced fined
  • 1 large tomato, chopped
  • 2 cups baby spinach
  • Juice of 1 large lime
  • 1/2 teaspoon turmeric powder
  • 1/2 teaspoon red chilli powder
  • Salt to taste
  • 2 cups water

Method:

  • Start the instant pot or pressure cooker or ninja foodi in Saute mode
  • Heat the oil/ghee
  • Add in the mustard seeds, cumin seeds and let them splutter for 10 seconds
  • Add garlic, let it splutter for 10 seconds
  • Add chopped tomatoes, spices and fry for 30 seconds
  • Add in the lentils, stir and add in water
  • Close lid of cooker and change mode to pressure cook
  • Pressure cook for 15 minutes
  • Let the pressure release naturally
  • Open the lid and add in the spinach and lime juice. Stir well and let us rest for 3-4 minutes, covered. The spinach will melt
  • Serve as a soup, over rice or with chapatis

Val Papdi – Flat Broad Beans

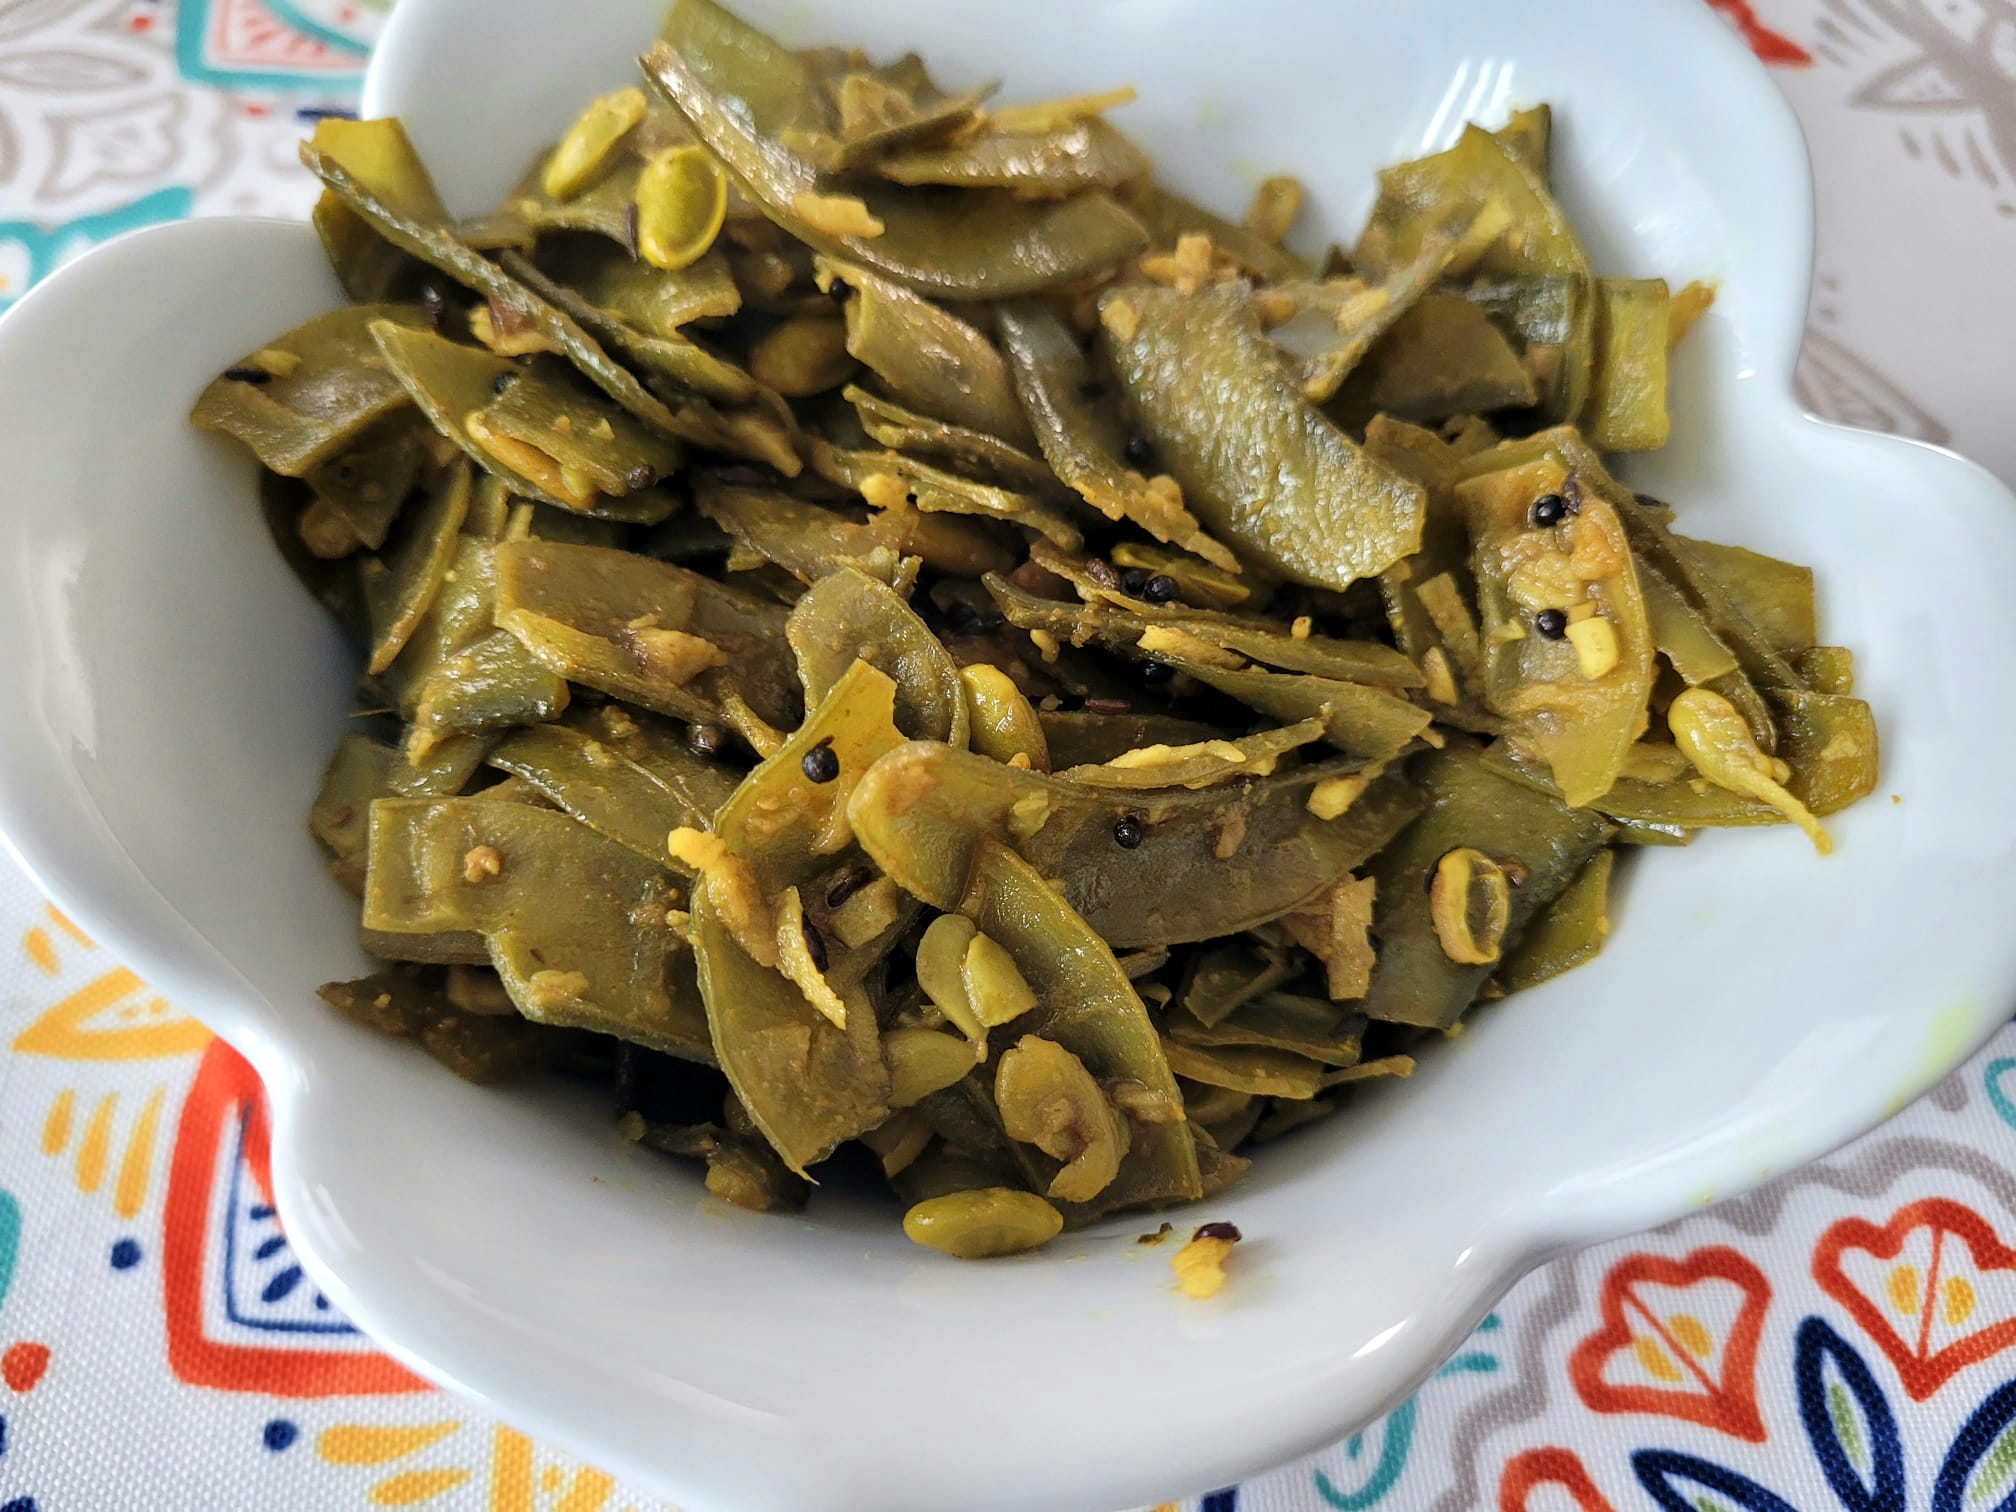
This Indian winter vegetable is long, flat with a slight curve. The pods are smooth, thick, and pale green, tapering at both ends. Each pod contains 2-4 seeds that are slightly flat. This vegetable is widely used in Indian cuisine and also in Chinese cooking. According to the site tarladalal.com, it is a low calorie, low carb vegetable that is good for weight loss. It’s packed with nutrients and can provide your daily intake of calcium, iron and magnesium. In the US, this bean can be found in the frozen section of an Indian grocery store. Here’s a recipe that is simple and flavorful and can be made in a jiffy when you want a side of greens for your meal.

Prep time: 5 minutes Cook time: 10 minutes

Servings: 4

Ingredients:

  • 1 tbsp olive oil
  • 1 12oz bag frozen val papdi
  • 1/2 tsp mustard seeds
  • 1/2 tsp cumin seeds
  • 1/4 tsp red chili flakes
  • 1 tsp garlic, chopped fine
  • 1 tbsp tamarind pulp (take a small ball of tamarind, add a few spoons of water to it, microwave for 1 minute and when warm to touch, squeeze out the pulp)
  • 1/4 cup shredded coconut (normal, not sweetened, can use frozen)
  • 1/4 tsp turmeric powder
  • salt to taste

Method:

  1. Heat oil in a frying pan. When oil is hot, add in the mustard and cumin seeds, let them splutter for a minute
  2. Add in the garlic and red chili flakes and let it sizzle for 1 minute
  3. Add in the val papdi, season with salt and turmeric powder, stir well
  4. Cover with a lid and let it cook in its own steam for 12 minutes
  5. Remove the lid and stir in the shredded coconut. Stir for 1-2 minutes
  6. Remove from flame. Serve with hot chapatis or as a side
Picture courtesy Tarladalal.com

Butter Chicken

Finger-licking Butter Chicken! The quintessential Indian dish that is found in New York, London, Sydney and often times, the smallest of Indian restaurants in points in between. Originating in the Indian sub-continent, it is a delicious, creamy, tomato-based curry with spice-infused chicken bites and can be as mild or spicy as you like. It’s simple and finger-licking good! Make it once and you’ll be making it again and again!

Marination:

  • 1 lb boneless chicken cut into bite size cubes
  • 3/4 tsp oil
  • 2 tsp ginger garlic paste
  • 1/2 tsp garam masala
  • 1 tsp cumin powder
  • 1 tsp coriander powder
  • 1/2 cup Greek Yogurt
  • 1/2 tsp red chili powder
  • 1/2 tsp red sweet paprika powder
  • 1 tbsp lemon juice
  • 1/4 tsp salt

Gravy:

  • 1/4 cup butter
  • 3 green cardamoms
  • 4 cloves
  • 1 cup red onion finely diced
  • 2 tbsp ginger – finely minced
  • 2 tbsp garlic – finely minced
  • 15 oz can tomato sauce
  • 20 cashew nuts
  • 1/4 cup milk
  • 1 tsp red chili powder
  • 3/4 tsp garam masala powder
  • 1/2 tsp coriander powder
  • 1/4 tbsp sugar
  • 1 tbsp kasuri methi (dried fenugreek leaves)
  • salt, to taste
  • 2 tbsp whipping cream

Method:

  1. Preparing the chicken:
    1. Marinate the chicken: In a Ziploc bag (or a container), mix all the ingredients mentioned under marination above with the exception of the chicken. When it is mixed well, add in the chicken and massage the marinate into the chicken. Cover/Close Ziploc and keep overnight in the fridge or 48 hours. The longer it rests, the more tender. I often buy chicken, cut it up and divide it between different marinades and freeze it for when needed
    2. Grill or cook the chicken:
      • In Air Fryer / Ninja Foodi: Pre-heat the Foodi with the basket for 5 minutes. Spray the basket with a little oil. Add the chicken pieces in a single layer making sure they aren’t touching. Spray the top of the chicken pieces with oil. Air Crisp on high for 360°F for 5 minutes. Then flip the pieces and continue on Air Crisp for another 3-5 minutes until the internal temperature is at least 165°F. Remove and place on a cooling rack/plate
      • On Stove Top: Add 1 tsp butter to a pan. When heated, add the chicken and marinade to the pan. Don’t overcrowd the chicken. Fry on high flame until liquid evaporates and chicken is cooked through.
  2. Prepare the gravy:
    • In a blender, make a smooth puree of the cashews and tomato paste and set aside
    • In a wide pan, heat the butter. Sauté the cardamom and clove till the cloves splutter and cardamom plumps up, and add in the onions
    • Sauté the onions for 2-3 minutes and add in the ginger and garlic. Continue to sauté the mix for 2-3 minutes on medium flame. The onions should be soft and translucent
    • Now add in the cashew, tomato puree and stir. Fry this mix on medium-low flame for 2-3 minutes
    • Add the chili powder, coriander powder, salt and sugar and continue to fry this mix until the puree starts to thicken and leave the sides of the vessel
    • Add the milk and continue to stir to form a gravy (Add more milk if a thinner consistency is desired)
    • Simmer for 4-5 minutes on a low flame
    • Add in the chicken and simmer for 4-5 minutes
    • Add in the garam masala and the kasuri methi and stir. Simmer for 2-3 minutes
    • Switch off the stove and pour in the cream and let it rest. No need to stir it in
    • Garnish with coriander leaves and serve hot with naan or rice
Grilled chicken pieces

Moong dal Kichdi

Comfort food! We’re in quarantine unfortunately, and my mind immediately went to the foods my mom would make to help our bodies heal and to boost immunity. Kichdi, a rice and lentil porridge, is one of those foods. A simple and quick one-pot dish that nourishes your body. Protein-packed, it’s a soothing Indian meal that’s perfect for someone under the weather (and even when you’re not)! I make this in the Ninja Foodi but it can be made in the Instant Pot or a Pressure Cooker.

Prep Time: 10 minutes Cook Time: 25 minutes Total time: 40 mins

Servings: 4

Ingredients:

  • 1 tbsp Ghee (or oil, for a vegan recipe)
  • 1/2 cup Basmati rice
  • 1/2 cup small whole green moong dal (or small yellow moong dal lentils)
  • 1/4 teaspoon turmeric powder
  • 1 Bay leaf
  • 1/2 teaspoon cumin seeds
  • 1/2 teaspoon mustard seeds
  • 1 teaspoon finely chopped ginger
  • 1 medium green chili finely chopped
  • 1 large tomato diced
  • Salt to taste

Method:

  1. Soak the basmati rice and moong dal in cold water for 15-30 minutes. Drain, rinse and set aside.
  2. Set the Ninja Foodi/ Instant Pot to sear option
  3. Add the 1 tbsp Ghee and when hot, add the bay leaf, cumin seeds, mustard seeds, ginger and green chili
  4. Stir for a minute, and then add the diced tomato
  5. Stir for a minute and add the rice and dal along with 3 cups of water, turmeric powder and salt
  6. Secure the lid, select the pressure cook option, close the pressure valve and cook for 15 minutes at high pressure (12 minutes if using yellow moong lentils instead of the small whole green ones)
  7. When done, slow release for 20 minutes and open lid to release pressure
  8. Serve with a tsp of ghee

Goan Shrimp Curry

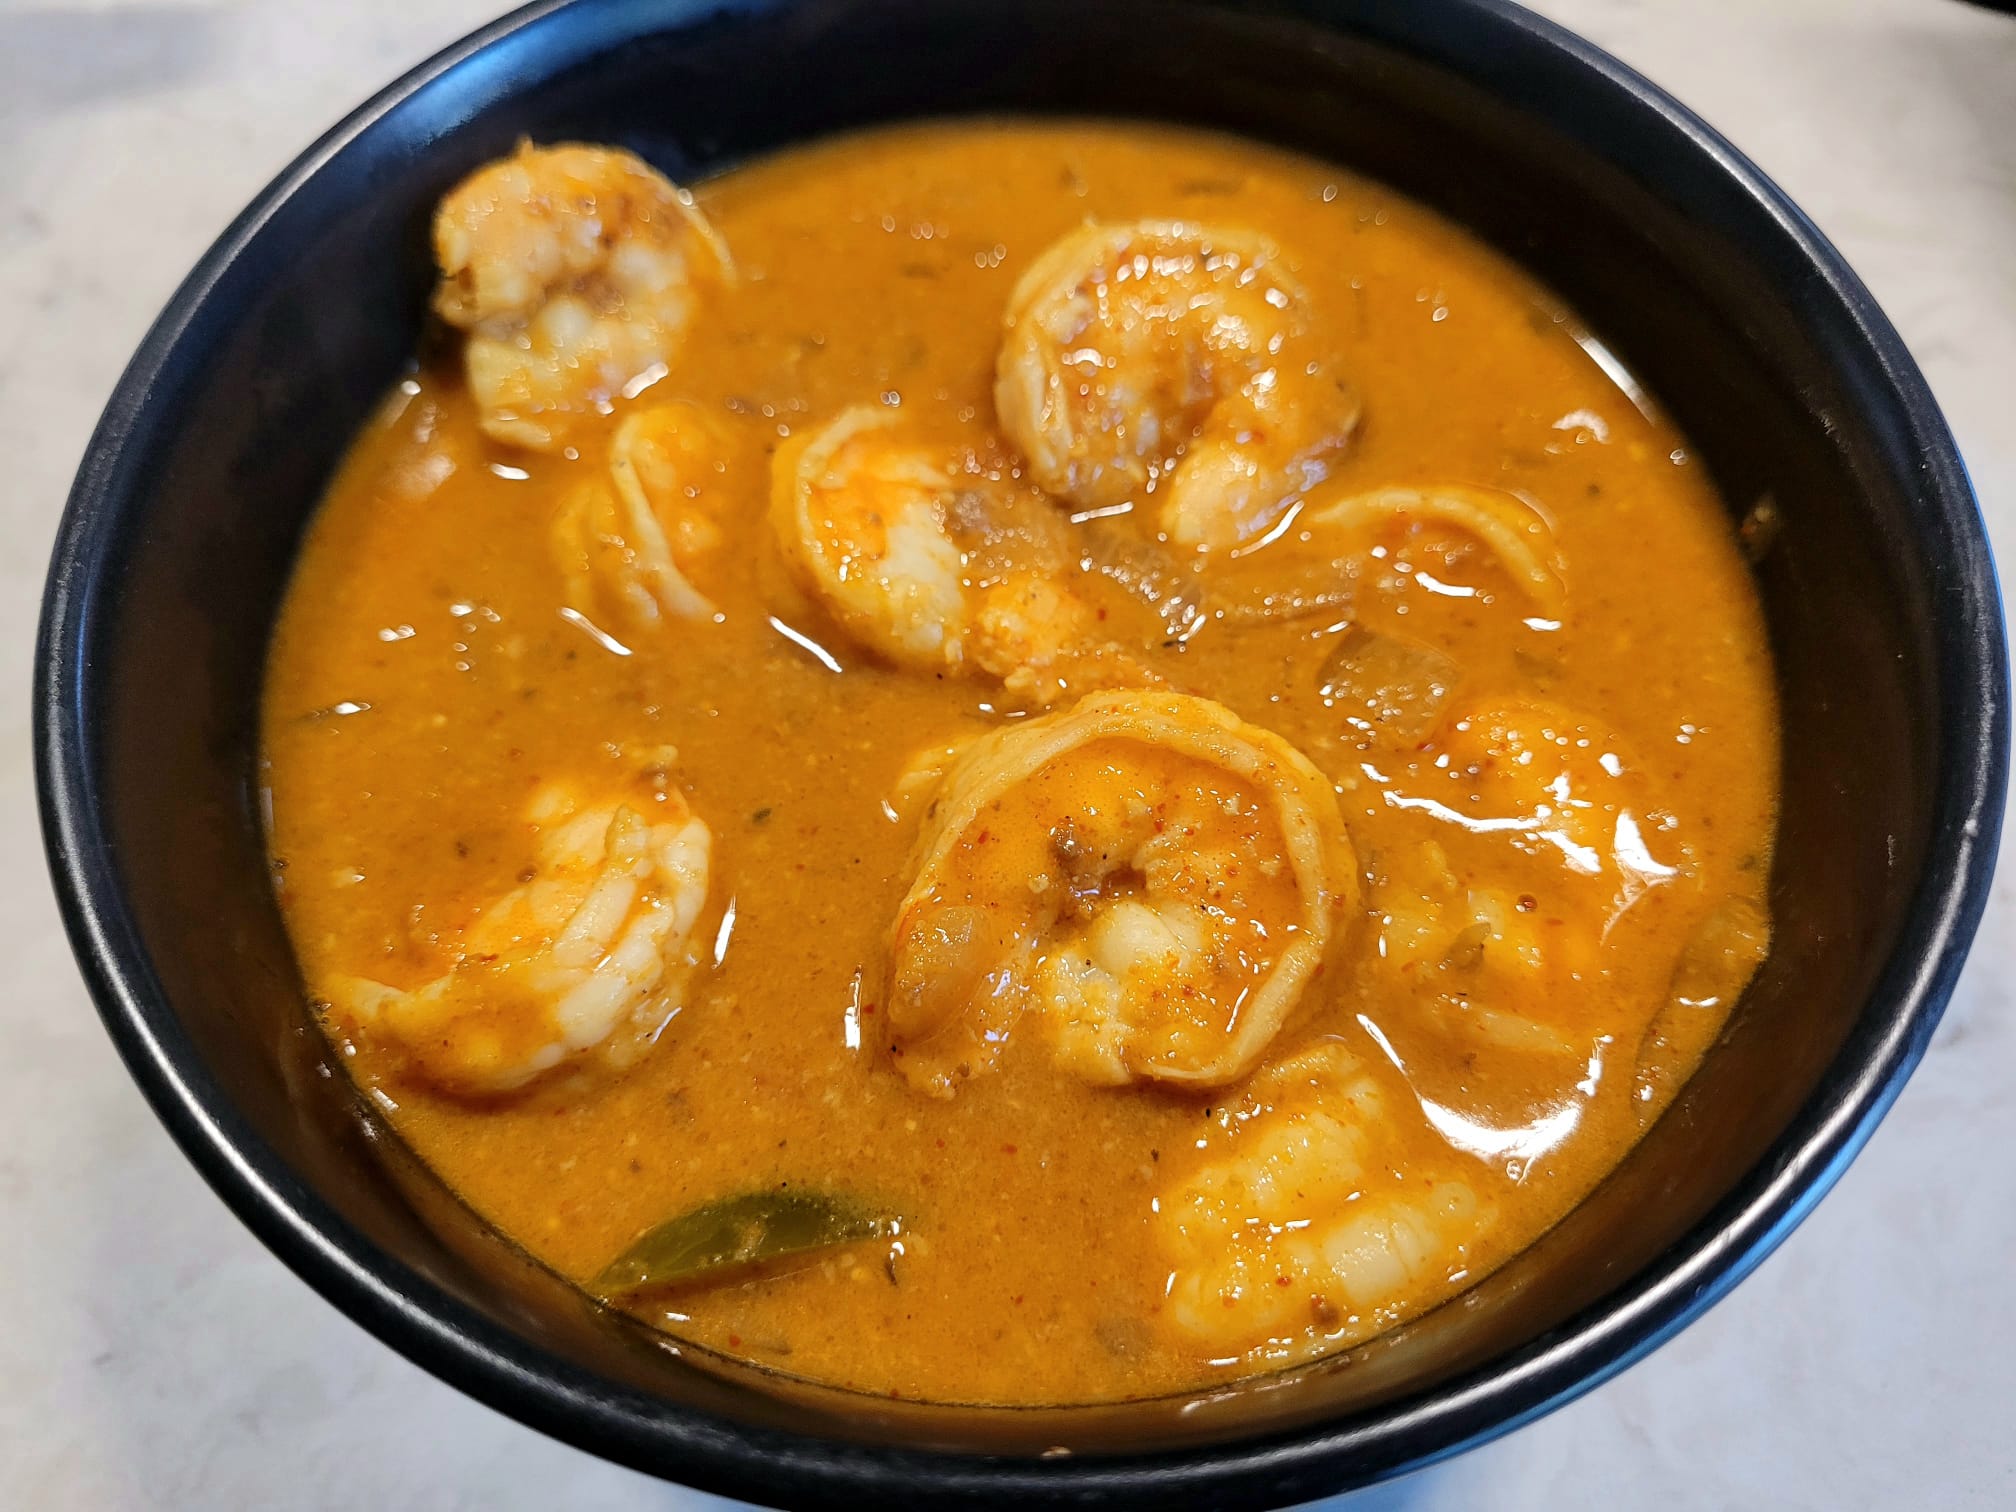
Curry and rice are Goan meal staples. Every summer when we visited our grandparents in Goa, we feasted on fresh fish. My parents would make a trip to the marketplace where you had a large, wet, slushy section devoted to fish. That’s where you heard fisherwomen loudly arguing with those who tried to haggle to a price that was deemed too ridiculous! These fisherwomen, all dressed so colorfully, sat with baskets overflowing with fish of all types – Shrimp/Prawns, Pomfrets, Mackerels, Kingfish, Shark. You had to know how to haggle or else, they smelled you were a novice and you’d end up paying three times the price. When my parents brought the fish home, we’d all help with cleaning the fish, and deveining those prawns. Then would come the grinding of the masala, on this large stone – that toned up your arm muscles by the end of the summer! Rechad-filled pomfrets, rava-prawns, ambot tik with shark, and prawn curry, the very thought makes me drool. But time is a critical asset these days, and thanks to shortcuts like coconut milk cans and food processors, I can whip up the same curries and then take my time enjoying the food and reminiscing about those holidays!

Servings: 4 people Prep time: 30 mins Cook time: 20 mins

Ingredients:

20 medium-sized Prawns or Shrimp – cleaned and deveined

For Masala

  • 1.5 cup unsweetened coconut milk
  • 8-10 Kashmiri red chilis
  • 6 Garlic cloves
  • 3 tsp whole Coriander powder
  • 2 tsp Cumin powder
  • 1 Tamarind (marble-sized ball)
  • 1/2 tsp Turmeric powder

Other ingredients:

  • 2 tablespoons Coconut oil
  • 1 medium Onion chopped finely
  • 1 medium Tomato chopped finely
  • 1 green chili – slit
  • Salt (to taste)

Method:

  • Apply ½ tsp salt to shrimp and leave aside for about 15 minutes
  • Grind all ingredients under “For Masala” using sufficient water to form a smooth paste. Keep aside
  • In a pan heat, heat coconut oil. Add onions. Fry till onions are a light golden brown and add tomatoes. Cook for 6-8 minutes till the tomatoes are soft
  • Add the ground Masala, green chili and salt to the pan. Fry for 3-4 minutes
  • Reduce the flame and simmer for 8-10 minutes
  • Add the shrimp and cook for 4-5 minutes (cooking times will change based on the size of shrimp used – large shrimp for 7-8 minutes, medium shrimp for 4-5 minutes and small shrimp for 2-3 minutes)
  • Turn off heat and let it sit for about 5 minutes
  • Serve with hot rice

Pea Pulav (Basmati Rice)

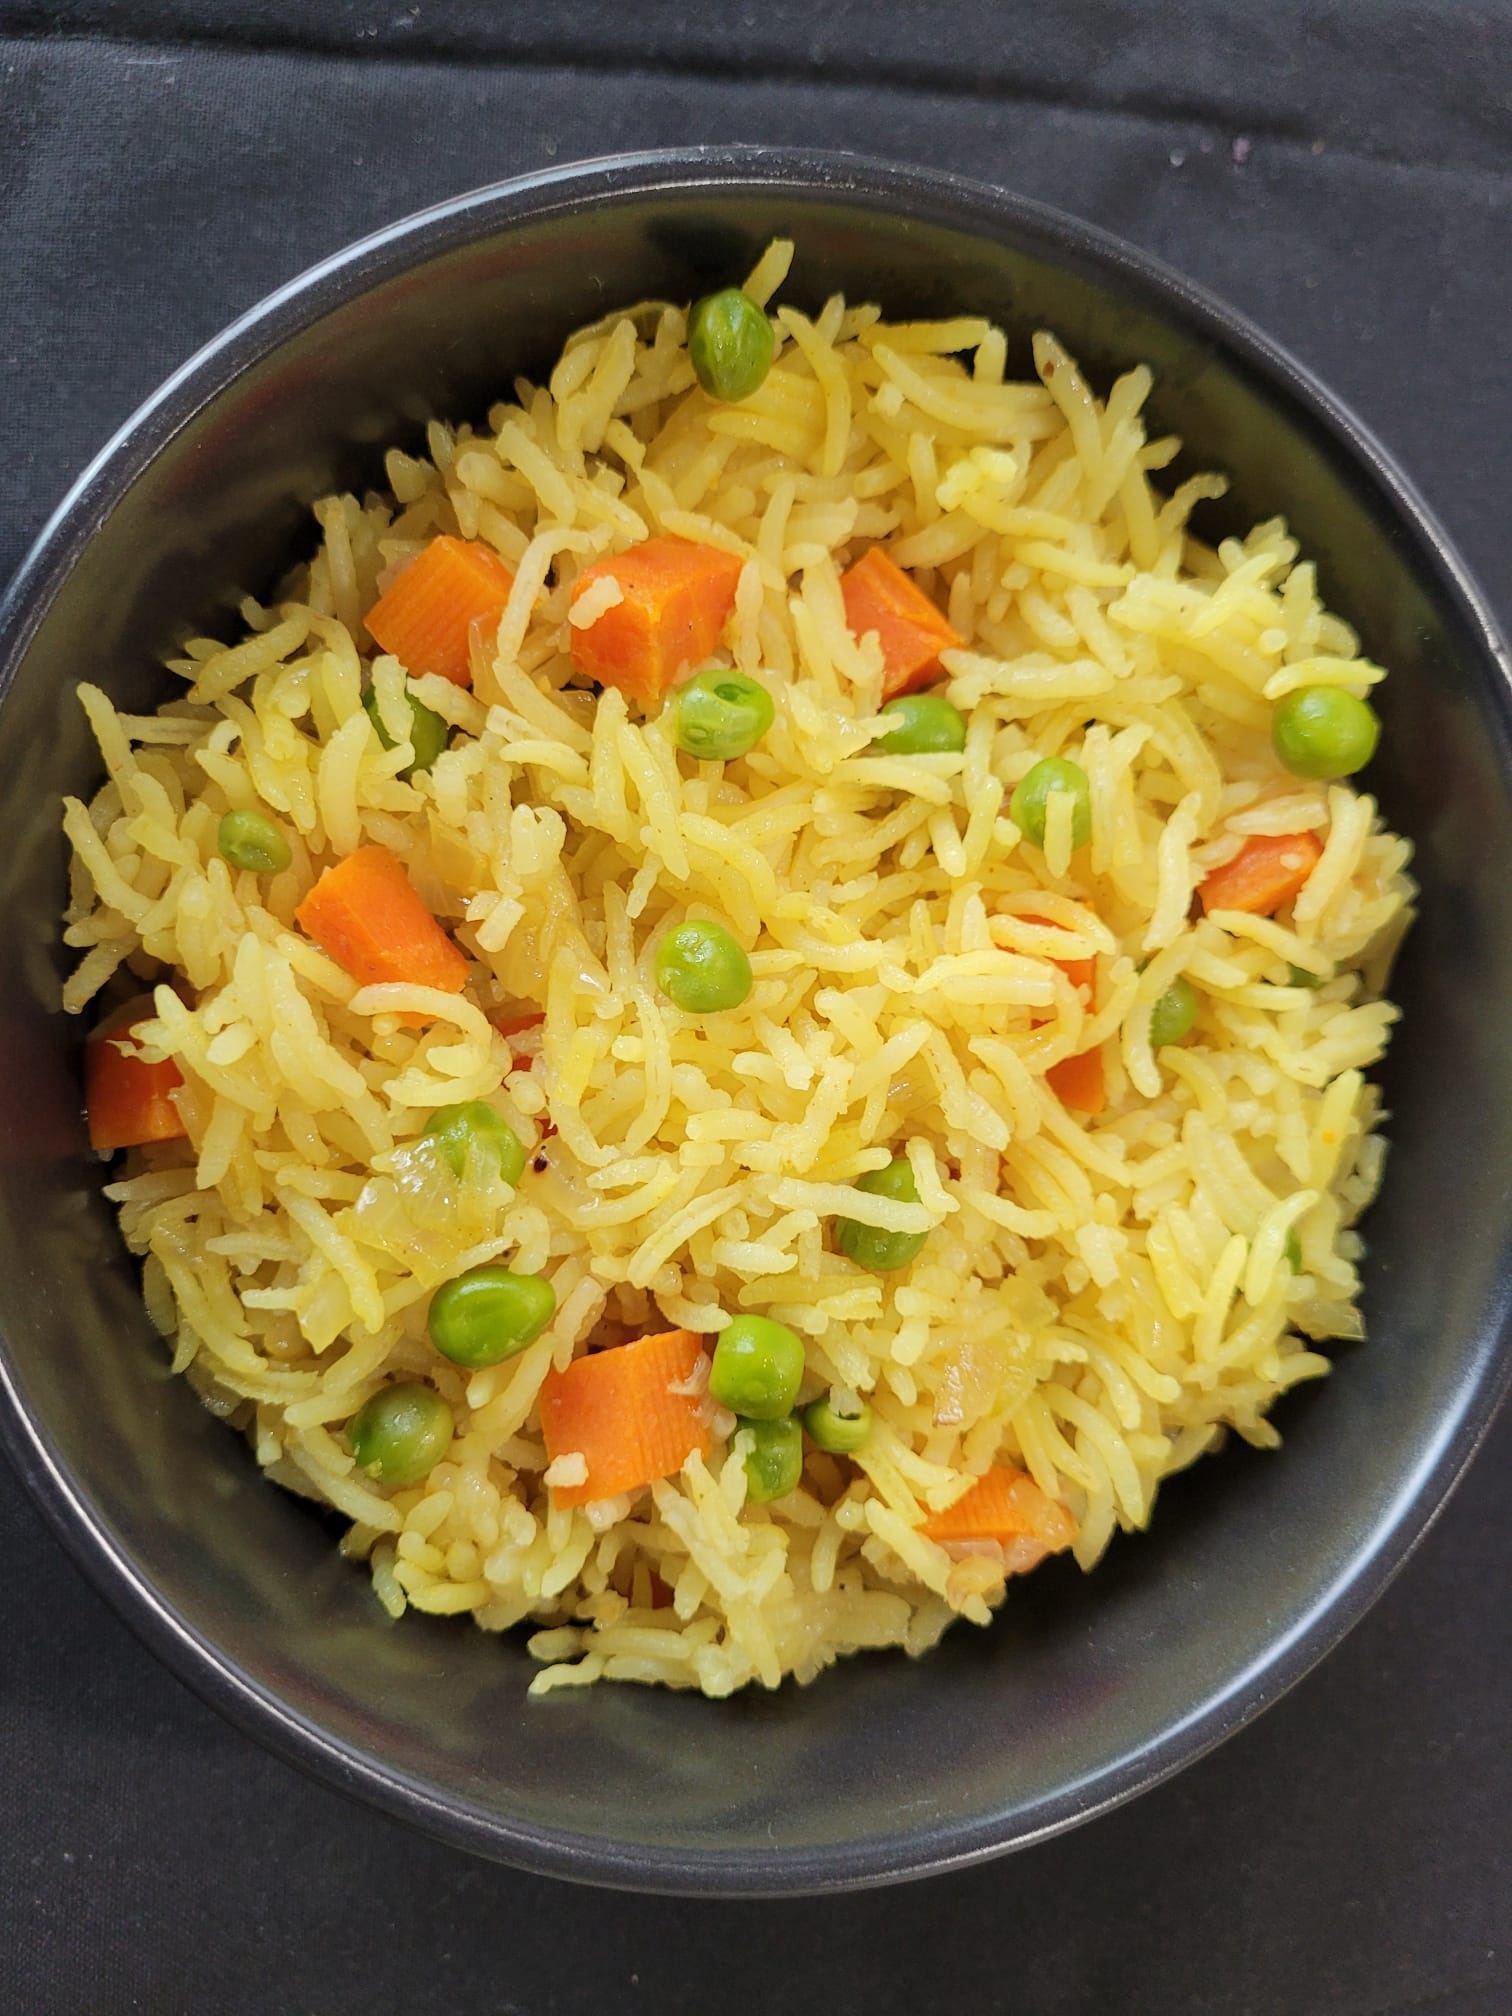
No Indian meal is complete without the fragrant Basmati rice. And, in our house, no birthday or celebration was complete without my mom’s flavorful pea pulav – an aromatic dish made with long-grained Basmati rice and green peas, and flavored with cardamoms, cloves, and other spices. It was inviting enough to eat on its own, no sides needed. When I make it for a Sunday-special lunch, I will often mix in other vegetables and have a delicious meal on-hand in no time at all.

Interestingly, each of the spices have a health benefit – so why not take a couple of minutes and add flavor and nutritional benefits to plain ol’rice:

  • Bay leaves are a rich source of vitamins A, and C, iron, potassium, calcium, and magnesium, promoting general health
  • Cloves are rich in antioxidants and minerals and known to strengthen the immune system, reduce inflammation, and aid in digestion
  • Thanks to it’s anti-inflammatory properties, peppercorn improves circulation, reduces joint pain and also helps combat high blood pressure and cardiovascular diseases
  • Cardamom helps improve oral health and may have antimicrobial, antioxidant, and anti-inflammatory properties
  • Turmeric is said to ease joint pain, stiffness, and inflammation

Servings: 4

Ingredients:

  • 1 cup Basmati Rice
  • 4 tbsp Ghee (or vegetable or olive oil)
  • 1 Bay leaf
  • 8 cloves
  • 8 Peppercorns
  • 1 inch Cinnamon stick
  • 4 Cardamom – crushed
  • 1 large Onion (chopped finely)
  • 1/2 tsp turmeric powder
  • 1/2 cup Green Peas
  • 1/2 cup Carrots (diced) – optional
  •  1 tsp Salt
  •  2 cups Broth ( veg, chicken or beef) – For perfectly separated rice – use the same cup to measure the rice and the broth

Instructions:

  1. Wash the rice very gently and drain all water. Rinse twice more so that the water is clear (this removes the starch from the rice). Drain water completely each time
  2. Place a large pan on the stove on medium heat
  3. Add the ghee to the pan
  4. Once the ghee is hot, add the Bay leaf. (Note: If the bay leaf sizzles immediately, you know the oil is hot. If not, wait a few more seconds, until you start to see the leaf sizzle)
  5. Add the rest of the whole spices to the ghee – cloves, pepper corn, cinnamon and cardamom
  6. Fry for 30 seconds
  7. Add the onions and fry for 2-3 minutes until the onions are translucent
  8. Add the turmeric powder and stir for another minute
  9. Add the rice to the pan, and fry for 1-2 minutes
  10. Add the stock, salt, and stir once, very gently
  11. Let the stock come to a boil then reduce the heat to low, and cover the pan with a tight fitting lid
  12. Let the rice cook – will take about 10-12 minutes
  13. After 10-12 minutes, check rice. If all the water is evaporated, turn off the flame. Keep the container covered – allowing it to sit covered for 5 minutes
  14. Fluff the rice and vegetables with a fork and serve

Goan Beef Curry (Ninja Foodi / Stove Top / Pressure Cooker)

Every Sunday morning after 6:30am mass, we’d go to see Nana and Papa (my maternal grandparents) who lived close to the church. The best part was the breakfast that followed – hot parathas, sunny-side up eggs, with beef “sidish” (i.e. curry). And Marie biscuits to dip into a cup of tea. But I digress. I didn’t realize a sidish actually meant side-dish until much later when I moved to North America. Nana’s beef side-dish, was a thick beef curry – spicy, tangy, and so delicious and the perfect accompaniment to eggs and parathas. It also made a great meal with a side of cauliflower and her aromatic rice pilaf.

SERVINGS: 4 – 6

INGREDIENTS:

  1. 2 tsp Cumin seeds
  2.  2 inches Cinnamon stick
  3.  10 cloves
  4.  10 black peppercorns
  5. 1/2 tsp turmeric powder
  6. 1 tsp red chili powder
  7. 8 large garlic cloves (peeled and roughly chopped)
  8. 2 inch ginger piece (peeled and roughly chopped)
  9. 1/2 onion (roughly chopped)
  10. 3 tbsp vinegar (I use apple cider vinegar one I run out of my stock of Goa vinegar. Regular vinegar works too)
  11. 2 medium potatoes (chopped into large cubes)
  12. 1 serrano pepper (or 2 green chilies (Indian or Thai) slit long
  13.  1 tsp sugar
  14. 3 tbsp oil
  15. salt to taste
  16. 2 lbs stewing beef
  17. Water

Method:

  1. For the ground masala:
    • In a small food processor, grind the first 6 ingredients until smooth
    • Add to that ingredients 7 through 10 and grind until smooth
  2. Add oil to a medium-sized non-stick pan or in a pressure cooker. When oil is hot, add in the ground masala, (keep the food processor aside, you’ll need it later) and fry on medium flame, until you see the oil start to separates from the ground masala – you’ll see it on the edges of the masala. About 2-3 minutes
  3. Add the beef chunks to the masala, stirring occasionally for about 2 minutes
  4. Add half a cup of water to the food processor, swirling to get any masala remnants and then add to the pan. Cook for about 3 minutes
  5. If using a pan to cook on stove-top:
    • Add 2 cups of water, stir gently, bring to a boil, then cover and cook for 20 minutes
    • After 20 minutes, remove cover, add the potatoes, salt and sugar, and cook for 20 minutes
    • Go to step 7
  6. If using a pressure cooker:
    • Add another half cup of water, stir gently
    • Add cover of pressure cooker
    • Cook on high pressure for 25 minutes
    • When the time is up, immediately release the pressure
    • When the pressure has been released, add in the potatoes, salt and sugar. Place the pressure lid on and turn the valve to seal. Pressure cook on high for 4 minutes
    • When done, immediately release the pressure
  7. Check meat for tenderness
  8. Adjust the salt, if you like
  9. Serve with Goan pav, bread, over rice, or with chapatis/parathas