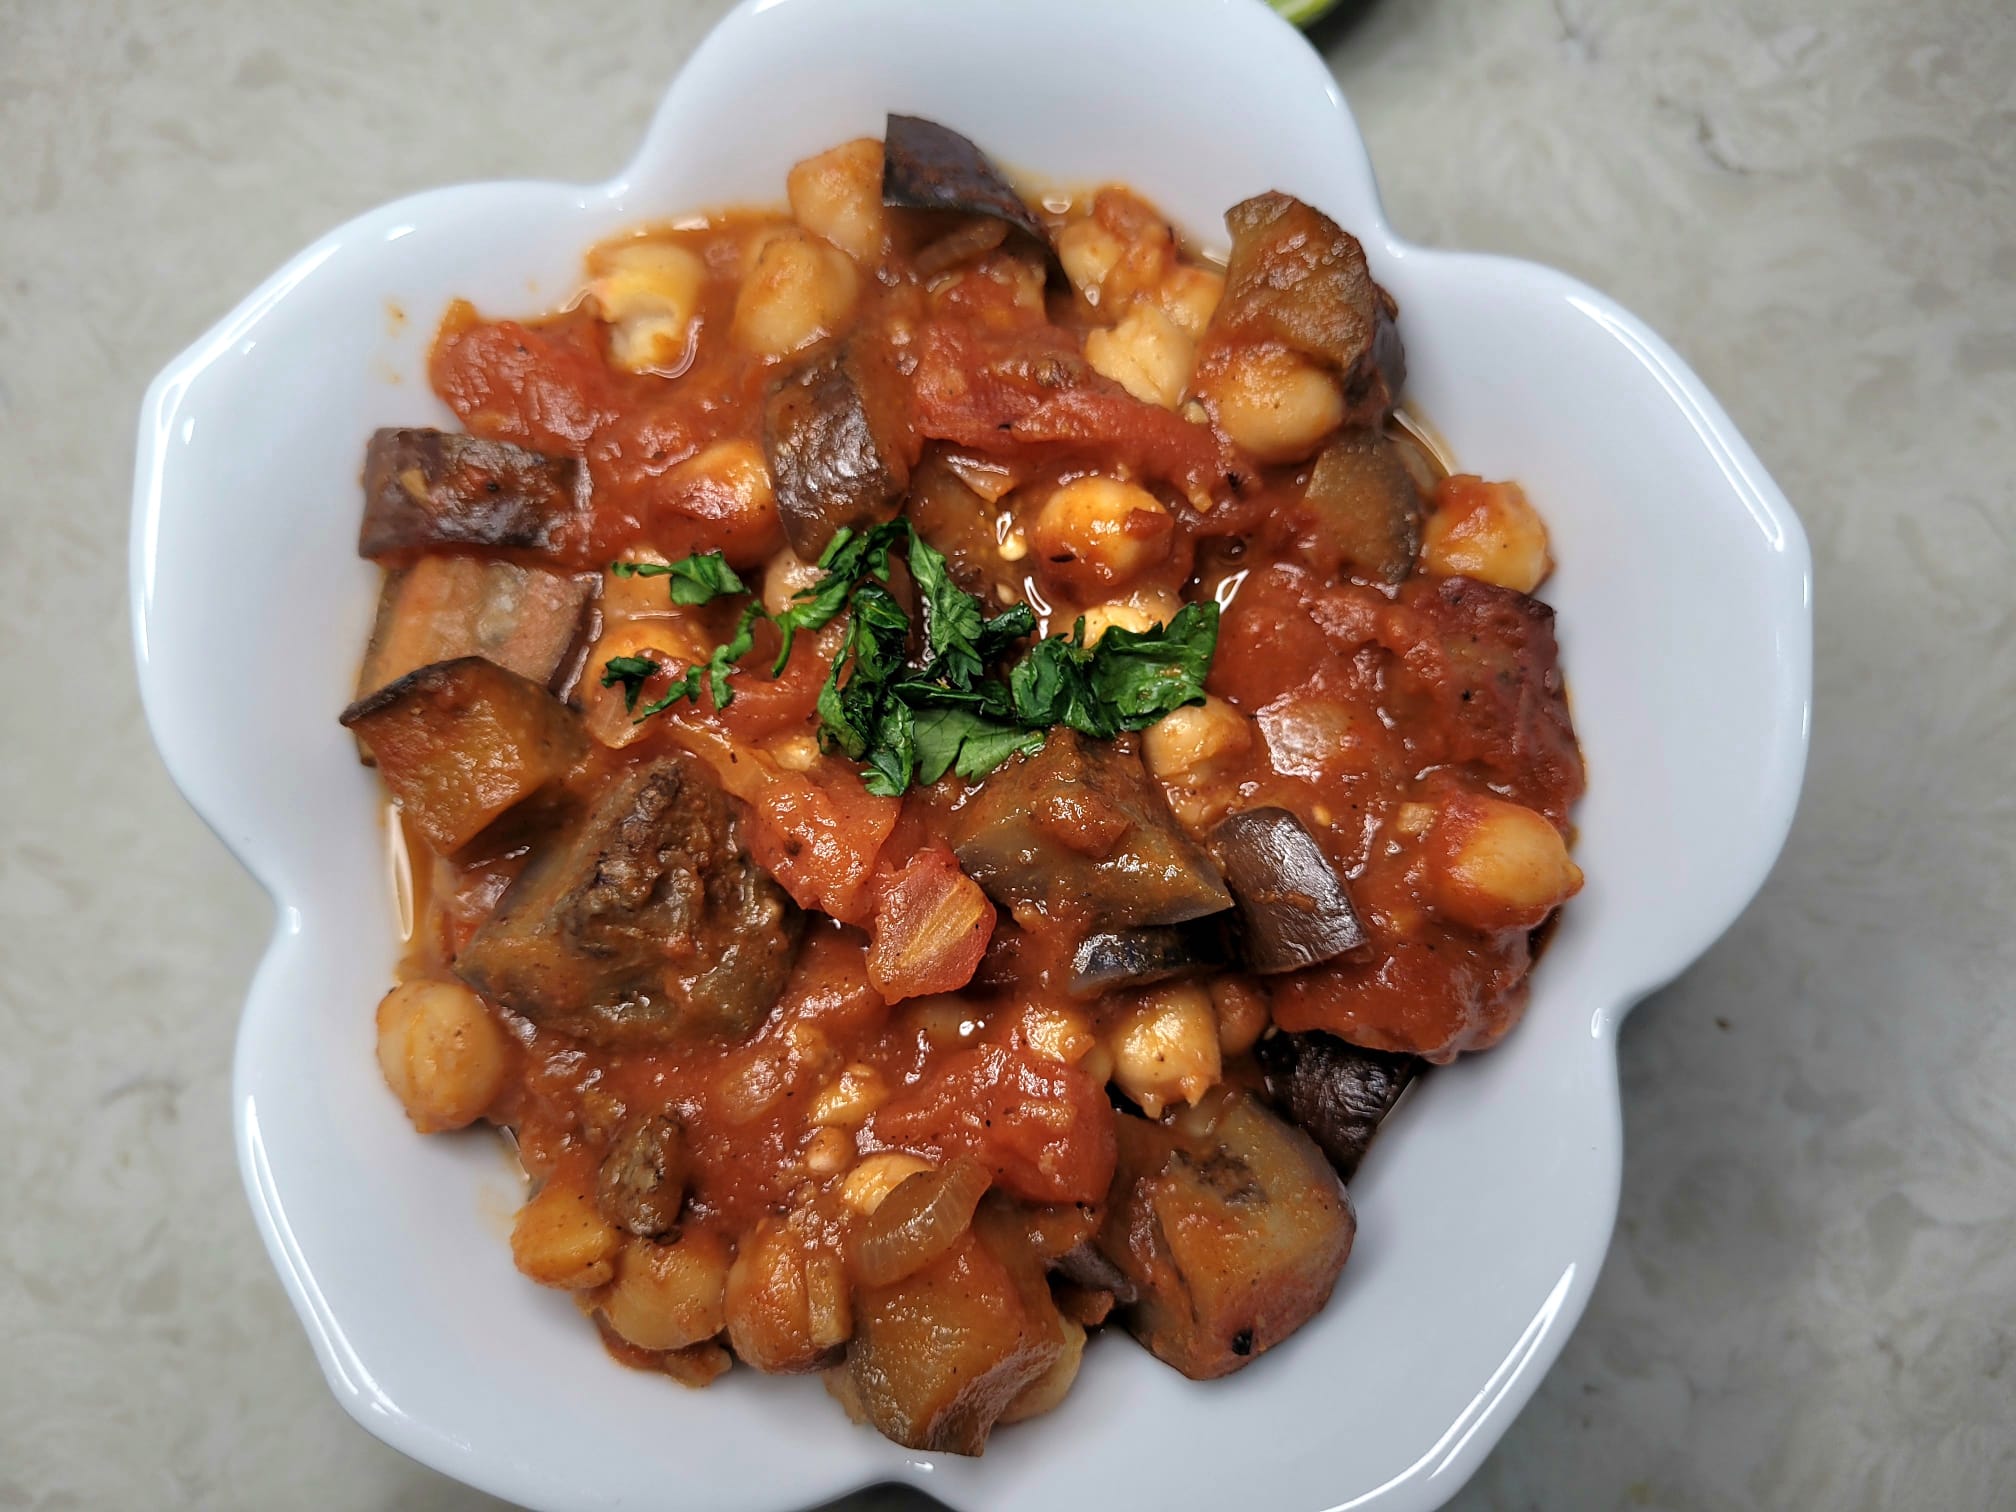
Cooking hack: Tips for soft parathas

Parathas are griddle fried, Indian flatbreads. These unleavened breads are easy to make and are a favorite in our home. Made with whole wheat, water, and ghee/olive oil for a vegan alternative, it’s a healthy and delicious alternative to store bought flour tortillas or rotis.

When we got married, Nilesh remembers waking up every morning where the aroma of ghee beckoned him to the kitchen. There the cook barely kept up rolling out parathas as Nilesh would wolf them down as soon as they came off the tava/pan.

Today, the kids and Nilesh relish it anytime of the day – with scrambled eggs for breakfast, rolled up with jam and cheese as a snacks, or for lunch and dinner accompanied with curries.

Making them doesn’t really take much time. And they are so delicious, shape doesn’t really matter. You will need a rolling pin, a pan or griddle to cook it on, whole wheat dough, a dash of salt, olive oil or ghee and you are ready to go.

Here is the recipe along with tips to make them soft.

Warm water: use lukewarm water to knead the dough. Add water in batches. Knead gently. Dough should not be too soft or too firm.

Ghee or olive oil: a tablespoon of warm ghee or olive oil added while kneading not only gives it a different aroma, but will make it softer.

Cover the dough and let it rest: after kneading the dough, cover it with a damp cloth and let it rest for 10-30 minutes. Not only will it keep the moisture in, it allows the dough to rise slightly the dough should be semi soft

Add milk or yogurt: adding room-temperature yogurt or warm milk while kneading, enhances the texture and makes and keeps the parathas soft

Rolling the parathas: parathas should be rolled slightly thicker than chapatis

Stove temperature: don’t cook them on too low or too high a flame. Cook on medium flame and add ghee when you see brown spots on the paratha and lower the flame to complete cooking. Move the paratha around on the tava and keep applying a little pressure with the back of a spoon or spatula to cook evenly.


Parathas – Indian unleavened flatbreads

Pronounced pa-ra-thas, these delicious, healthy, flaky, unleavened Indian flatbreads, are made with whole wheat flour. These are best enjoyed warm with curries, lentils or vegetable dishes. They are also a good alternative for tortillas and wraps.

The word paratha is the combination of the words ‘Parat’ meaning layers and ‘Atta’ meaning dough. It translates to layers of dough that are cooked.

When making parathas, the dough in layered onto itself before it’s rolled into a triangle on a lightly floured surface. The rolled dough is then cooked in a hot tava (griddle) while brushing ghee or alternatively, olive oil, toasting until both sides have golden brown spots and crispy. The longer you cook, the crispier they get. Follow these tips to make perfectly soft parathas each time.

These parathas are great for curries, rolled up with jam or jam and cheese, or chutneys. In our home, they are a welcome alternative to bread for breakfast.

Servings: 8 parathas

Time: 40 minutes including resting time

Equipment: large mixing bowl, rolling pin (and surface to roll it on), tongs/flipping spatula, tava or griddle

Ingredients:

  • 2 cups whole wheat flour (atta…available in Indian stores)
  • 1 to 1.25 cup of water (as needed)
  • 5 tablespoons ghee or oil (to add to the dough as well as during roasting)
  • 3/4 cup dry flour for dusting during rolling
  • 1/4 teaspoon salt

Instructions

  1. Add 2 cups of dough, 2 teaspoons of the ghee/oil and salt to the mixing bowl
  2. Slowly add water in batches, while kneading the dough in either a dough mixer or by hand to make a firm dough. I usually use a 2:1 ratio or flour to water
  3. If the dough is too difficult to knead then add drops of water at a time, until it is soft and pliable
  4. Cover with a damp cloth and set aside for atleast 20 minutes
  5. Now divide the dough into 8 equal parts and roll each part into a ball. Keep the balls covered with the damp cloth as you roll each one out
  6. Lightly flour the rolling area and place a ball of dough on it. Roll the dough into a circular shape with the help of the rolling pin
  7. Smear a little ghee on the paratha evenly with the back of a teaspoon. Then fold into half. Now smear the semi-circle with a little ghee again, then fold into half, forming a triangle. Lightly sprinkle flour on both sides
  8. Sprinkle flour on the rolling surface and lightly roll out the folded paratha. Don’t make it too thin. While rolling this, heat the griddle on a medium flame. I usually roll 3-4 parathas while the griddle heats up, keeping the rolled parathas aside, ready to cook
  9. When the griddle is hot, place a paratha on it. Soon it will start to puff. Manage the heat, too hot and it will burn, too low a flame and the paratha will be too hard
  10. When the paratha puffs, flip it over. On the slightly cooked side, smear ghee with a teaspoon, spreading it evenly. Gently press the paratha with a spatula enabling it to cook evenly. You will see brown spots as it cooks Flip the paratha and add ghee to the other side. You will see it puff and the layers separate. You will continue to see brown spots. Flip as needed, cooking while more brown spots form
  11. Remove from heat and stack in a closed container so parathas remain soft and warm
  12. Repeat the process to cook the rest of the flatbreads
  13. Eat warm with curries, lentils or sauteed vegetables. Roll it with jam or chutneys. If stored, warm on the pan later. If you warm in a microwave, cover with a damp paper towel to maintain softness

Steps in pictures

Knead the dough and let it rest while covered with a damp cloth. Then divide into 8 equal portions and roll each portion into a ball.
Take one of the eight dough balls and roll into a circle
Add flour to the rolling surface so the paratha doesn’t stick to the surface.
Smear the semi circle with ghee and fold again to form the triangle. Dust lightly with flour on both sides
Roll the triangle out gently ….make sure it’s not too thin
Smear with ghee and fold into half
Cook on medium flame, smearing with ghee and flipping until the layers separate and brown spots form on both sides


Hawaiian Meatballs

Delicious, succulent meatballs that are smothered with a sauce that is sweet and tangy make for a side dish, appetizer or main dish. Serve with a side of vegetable fried rice and transport yourself to the Hawaiian islands.

Time: under 15 minutes

Servings: 4

Ingredients

  • 1.5 lbs cooked Meatballs
  • 1 cup pineapple chunks or 1 can pineapple chunks drained1 cup barbeque sauce
  • 1/8 cup rice wine vinegar
  • 1/8 cup soy sauce
  • 1/8 cup brown sugar
  • 1 teaspoon sriracha sauce (optional)
  • 2 large cloves garlic minced
  • 1 tablespoon ginger minced
  • 1 small onion diced fine
  • 1/2 cup sweet red peppers chopped
  • 1 stem green onion chopped for garnish
  • 1 tablespoon sesame or olive oil

Method

  1. In a small bowl, whisk the bbq sauce, vinegar, soya sauce, brown sugar, and sriracha sauce
  2. Heat oil in a frying pan. When hot, add the onions, ginger, and garlic. Stir fry for a minute until the onions are translucent
  3. Add in the meatballs and the peppers and stir for a minute
  4. Pour the sauce and continue to stir fry until the meatballs are well coated with the sauce.
  5. Add in the pineapple. Turn the heat to simmer and cook for another two minutes
  6. Turn off the stove and sprinkle the spring onions over the meatballs
  7. Serve with a side of vegetabke fried rice or plain rice and a side of vegetables

Tofu bowls

Vegan, and deliciously flavorful, this tofu bowl is worth skipping takeout for.

Servings: 4 bowls

Ingredients

  • 14 ounce package extra firm tofu
  • 2 tablespoons cornstarch
  • 3 Tbsp toasted sesame oil
  • Marinade:
  • 1/2 cup tamari (or soy sauce if not gluten-free)
  • 1/4 cup rice vinegar
  • 1 Tbsp garlic, finely minced
  • 1 Tbsp ginger, grated 
  • 2 Tbsp ketchup
  • 2 Tbsp maple syrup (optional)
  • 1 Tbsp Sriracha hot sauce (optional if you don’t like it spicy)
  • For the bowls
  • 1 lb broccoli chopped and steamed
  • 1 cup carrot sticks
  • 1 red pepper, cut into thin slices
  • 1/2 cup radish, cut into thin rounds and marinated in 2 tablespoons rice vinegar and 1 tablespoon sugar
  • 1 cup edamame, steamed
  • 1 cup cucumber, chopped into small cubes or circles
  • 2 green onions, thinly sliced
  • 2 cups white or brown rice, cooked (optional)
  • 2 tablespoons sesame seeds
  • Spicy mayo sauce – combine 2 parts vegan mayo to 1 part sriracha. 

Method

  • Drain the tofu by pressing down on it gently between two paper towels, to get rid of the liquid. Cut tofu into 2 x 1/4-inch slices and set aside and toss in a bowl with cornstarch.
  • In a mixing bowl, mix the ingredients under the marinade list to create the marinade.
  • Now gently add the tofu to the marinade, and stir gently to coat the tofu on all sides with the marinade. You can set it aside for 15 minutes or longer in the fridge.
  • Add the sesame oil to a frying pan. When oil is hot, add the tofu and fry. Let the tofu cook for 2-3 minutes on each side until golden brown. 
  • Serve hot in bowls layered with rice (optional), vegetables, tofu and sprinkled with the sesame seeds. Drizzle with the spicy mayo sauce.

Baja Fish tacos

These fish tacos are the best. Easy to make, fresh, and flavorful with smoky, spicy white fish, crunchy cabbage, pineapple salsa, and the best creamy fish taco sauce! It takes less than 30 minutes to make, so it’s perfect for a weeknight or a make ahead meal.

When you are looking for make-ahead meals, this recipe is easy to prep and keep in the fridge. Fry or bake the fish right before meal time and you will have hot, delicious fish tacos on the table in no time. Wrap it into a delicious burrito for a meal at work or school or make it into a healthy fish taco bowl. Either way, the smoky, zesty favors of adobo shine through and this will be a sought after recipe for Taco night, Lenten fish Fridays or just about anytime. Best of all, it’s a good dose of healthy – the red cabbage slaw provides your daily serving of vitamin C and vitamin K while the fish adds a boost of protein and omegas.

While it looks complicated, there are three easy steps to making the fish tacos: prepare the fish, whip up the sauce, and prep the taco toppings. Serve and enjoy!!

Servings: 4-6

Ingredients for the Adobo fish

  • 1 pound fish (Cod, halibut or tilapia) cut into small cubes
  • 2 chipotle chilis in adobo mashed up and 2 teaspoons of adobo sauce
  • 1 teaspoon cumin powder
  • 1 teaspoon garlic powder or minced fresh garlic
  • 1/2 teaspoon kosher salt
  • Juice from 1 large lime
  • 3/4 teaspoon turmeric powder (optional)
  • 2 tablespoons olive oil
  • 1 cup flour
  • 8 corn tortillas

Ingredients for the coleslaw

  • 1/2 medium head of red cabbage, shredded or finely sliced
  • 1/4 cup apple cider vinegar (or red wine vinegar or white vinegar)
  • 1.5 teaspoon granulated sugar
  • 1 teaspoon kosher salt

Ingredients for the adobo crema sauce

  • 3/4 cup mayonnaise
  • 2 chipotle chilis in adobo sauce
  • Juice of 1 lime
  • 1teaspoon honey

Ingredients for pineapple salsa

  • 2 cups fresh pineapple diced
  • 4 small Roma tomatoes diced
  • 1-2 red or green jalapenos, finely diced (dressed for less heat)
  • 1/2 cup red onion, finely diced
  • 2 cloves garlic finely diced
  • 1/4 cup chopped cilantro
  • Juice from 1/2 large lime
  • 1/2 teaspoon kosher salt

Optional topping: Poblano peppers sliced and grilled or pan fried

Method:

For the fish:

Place the chopped chipotle chilies in a small bowl, add the adobo sauce, cumin powder, garlic, turmeric, salt, lime juice, and stir to form a paste. Place the fish in the bowl and rub it to cover all pieces with the marinade. Keep in a Ziploc bag in the fridge. When ready to fry, heat oil in a frying pan. Place the flour on the plate and lightly coat each fish piece on all sides with the flour before frying. Turn on all sides until cooked.

For the coleslaw:

Mix all ingredients in a bowl and set aside for at least 15 minutes for the flavors to set in

For the adobo cream sauce:

Mix all the ingredients in a bowl and keep aside. Drizzle lightly over the fish when serving.

For the pineapple salsa

Mix all the ingredients in a bowl and keep aside for at least 15 minutes to let the flavors mix in.

To serve:

Heat the corn tortillas on a large dry skillet or griddle over medium/high heat.

To assemble:

Layer the tortilla with pieces of fish, the cabbage slow, the pineapple salsa, and drizzle with that awesome taco sauce! Serve with a fresh lime wedge to squeeze over tacos.

Alternatively, serve as a bowl on a bed of lettuce and cabbage slaw

Fish Taco Bowl

Butternut Squash Mash (Bharta)

Washington DC has some great restaurants but it almost seems like if you don’t make a reservation, you are out of luck. Having been told our wait times were closer to an hour at several places, my colleague and I finally stumbled on an Indian restaurant with outdoor seating. Outdoors in 45F weather didn’t sound appealing but we checked out the enclosed tent and with a space heater right next to us, it wasn’t so bad after all.  And I am glad we took the chance, as we had this finger-licking butternut squash bharta (mash) dish. This dish is a take on the traditional Indian dish of baingan (eggplant) bharta. Not too spicy, with hot garlic naan, it was the perfect meal for a damp, cold winter day.

So, I had to make this dish at home. Try it out – grab some hot chapatis or naans to scoop it up with it and you won’t be disappointed.

Servings: 4

Ingredients:

  • 2 tablespoons olive oil
  • 5 cups diced butternut squash (about 2 pounds)
  • 1/4 teaspoon black mustard seed
  • 1/2 teaspoon cumin seeds
  • 1 large red onion diced fine
  • 2 inch piece of ginger diced fine
  • 6 large garlic cloves diced fine
  • 2 large tomatoes chopped
  • 2 small green chilli’s, chopped
  • 1/2 teaspoon red chili powder
  • 1/2 teaspoon garam masala
  • 1 teaspoon coriander powder
  • 1/2 teaspoon sugar
  • 1/4 cup chopped fresh cilantro
  • Juice of 1 large line
  • Salt, to taste
  • 1/3rd cup water

Air fryer Method:

  1. Switch the ninja foodi to the saute mode
  2. When hot, add in the oil and heat it. When the oil is hot, add in the mustard and cumin seeds, allowing it to splutter
  3. Add in the onions, ginger and garlic, frying them well for 3-4 minutes
  4. Add in the tomatoes and continue to fry until the tomatoes have softened – about a minute
  5. Stir in the coriander powder, red chili powder, garam masala, green chilli, salt and sugar
  6. Add the butternut squash and water
  7. Close the pot with its lid. Press the pressure cook button and cook on high pressure for 8 minutes. Let the pressure release naturally for 5 minutes and then do a quick release
  8. Now slowly open the pot, press saute and then mash the cooked squash with a potato masher
  9. Let it simmer on saute mode for 6 to 8 minutes until the excess water evaporates and bharta becomes little dry
  10. Switch the foodi/instant pot off and garnish with lime juice and cilantro
  11. Serve the bharta with chapatis or naan

Oven and stove top method:

  1. Preheat oven to 350° F. Use a sharp knife to halve the squash lengthwise and scoop out seeds with a spoon. Rub the cut sides of squash with one tablespoon oil and season with salt. Place cut side down on an unlined baking sheet and roast for 60-75 minutes
  2. Remove from oven and scoop the flesh into a bowl. Mash with potato masher until smooth and set aside
  3. In a large vessel, add the remaining oil. When hot, add in the oil and heat it. When the oil is hot, add in the mustard and cumin seeds, allowing it to splutter
  4. Add in the onions, ginger and garlic, frying them well for 3-4 minutes
  5. Add in the tomatoes and continue to fry until the tomatoes have softened – about a minute
  6. Stir in the coriander powder, red chili powder, garam masala, salt and sugar
  7. Add in the squash and stir well. Garnish with cilantro and lime juice
  8. Serve with chapatis, or naans

Korean shrimp and daikon stirfry

Daikon also known as the Japanese radish, is a root vegetable. Grown throughout East and South Asian countries, it’s nutritious, crunchy, refreshing and can take on different flavors depending on how it’s cooked. Daikon are less spicy than their commonly consumed cousin, the red radish.

It is a superstar vegetable with it being a low-calorie food filled with high water content and packed with vitamins and nutrients, including vitamin C, calcium, folate, and potassium. Besides containing fiber and enzymes that aid digestion, it is also known to heal wounds quickly.

This perfect blend of daikon, carrots and shrimp come together for an easy, quick weeknight meal filled with sweet, tangy, and fiery flavors.

Serving: 3 as a side

Time: 15 minutes including prep time

Ingredients:

  • 2 cups diced (small cubes) daikon
  • 1 lb deveined, cleaned uncooked shrimp, washed and seasoned with a dash of salt and pepper
  • 1 tablespoon apple cider vinegar
  • 1 yellow onion diced fine
  • 2 scallions/ green onions chopped fine
  • 1/2 cup carrot, chopped into small rounds or cubes
  • 2 tablespoons gluten-free tamari or soya sauce
  • 2 tablespoons gochujang paste
  • 1 teaspoon sugar
  • 1 tablespoon oil

Method

  • In a wok or frying pan, heat the oil. When hot, add the onions and the whites of the scallions. Stir fry for a minute until onions are translucent.
  • Add the daikon and carrots to the pan, stir frying at high flame for 3 minutes making sure it doesn’t burn. Cook a minute or two longer, if you like your vegetables softer in texture.
  • Add in the soya sauce/ tamari, apple cider vinegar, sugar, and gochujang paste and stir fry for another minute.
  • Add in the shrimp and stir fry for another 1-2 minutes until the shrimp is cooked.
  • Remove from flame and garnish with the left over scallion greens.
  • Serve over a bed of freshly steamed rice.

Juicy, lean Mediterranean Turkey Meatballs

Hands down the juiciest turkey meatballs you can make. The secret to the moistness in these meatballs is a combination of yogurt, zucchini and bread. Try these, and you will think twice before buying store bought meatballs again. And it’s also a great way to sneak some veggies in!

Our family loves meatballs….in pasta, curry, Mediterranean bowls, a sub, or on its own, the possibilities are endless. It’s easy to make meatballs at home and freeze them. Turkey meatballs can be still juicy and delicious and most of all, lean and healthier than beef meatballs.

Prep time: 10 minutes. Cook time: 30 minutes

Servings: for 4 – 6;people

Ingredients

  • 1.25 lbs 93% lean ground turkey
  • 4 cloves garlic finely minced
  • 1 small red onion finely diced
  • 2 cups baby spinach (chopped)
  • 1 tsp dried chili flakes (optional if you like it spicy)
  • 1 cup grated zucchini, liquid squeezed out well
  • 2 slices whole wheat bread, or gluten-free bread
  • 1/4 cup Greek yogurt
  • 1/4 cup seasoned whole wheat breadcrumbs, or gluten-free panko
  • 1 large egg
  • 1 tbsp fried oregano, chopped
  • 1/4 cup fresh parsley, chopped
  • 2 tbsp chopped fresh mint, chopped
  • 1 tsp kosher salt and fresh black pepper
  • Olive oil cooking spray

Method:

  1. Preheat oven to 400 degree Fahrenheit.
  2. Spray olive oil on a sheet pan and set aside.
  3. Put the slices of bread in a bowl and cover the slices with water. Allow it to soak for about 1 minute.  Discard the water and squeeze the water out from the bread. Crumble it a bit with your hands and add it to a mixing bowl.
  4. To the same mixing bowl, add in the rest of the ingredients seasoning with salt and pepper.
  5. Form balls (golf sized) with that mixture and arrange them on a sheet pan.
  6. Bake in the heated oven for 30 minutes or until meatballs are fully cooked.
  7. Then transfer to the top rack and turn on the broiler for 1-2 minutes or until the tops are boiled.
  8. Alternatively, in a skillet, add in a tablespoon of olive oil and heat on medium flame. When the oil is hot, add the meatballs and cook over low heat, until cooked through, turning halfway, for about 10-12 minutes or until cooked thoroughly.
  9. Serve them in a Mediterranean bowl with greens, feta, olives, couscous, and all the sauces you like. Alternatively, they taste great in pasta.

Korean Ground Turkey

Sweet, sour, spicy come together for a delicious flavor profile in this Korean Ground Turkey recipe. This dish has become a comfort food for the kids. Combine it with a bowl of steaming Jasmine rice, a side of broccoli, carrot sticks and edamame beans and viola, a perfectly healthy, flavorful meal at your fingertips.

This is a perfect weeknight dinner as it is ready under 15 minutes. This recipe is often made with beef but I substitute turkey or chicken for a lean option.

Ingredients:

  • 1 pound lean ground turkey or any lean ground meat
  • 1/4 cup soya sauce
  • 1/4 cup brown sugar
  • 2 tbsp siracha sauce (or to taste)
  • 1/2 tsp dry red chili flakes
  • 3 large cloves of garlic, chopped fine
  • 1 tbsp ginger, chopped fine
  • 2 tbsp sesame oil
  • 1 tsp roasted white sesame seeds for garnish
  • 1/4 cup finely sliced green onions for garnish

Method

1. In a frying pan, heat the oil. When hot, add in the red chili flakes, ginger and garlic. Stir fry on medium heat for a minute

2. Add in the ground meat, frying it well, breaking the meat into crumbles over medium heat, until it is no longer pink

3. Add in the soya sauce, brown sugar and Sriracha, mixing it well, until it is well combined. Let it simmer for 2 minutes

4. Serve on a bed of hot rice, garnished with the sesame seeds and green onions. Add a side of vegetables like sweet pepper strips, cucumber slices, steamed edamame beans, broccoli, green beans or carrot sticks


Cluster beans (gawar)

A simple, healthy dish made with cluster beans or gawar phali as it’s commonly known in India.

Cluster Beans are a legume, also known as gavar, gawar, or guvar beans, often available in fresh and frozen forms at an Indian grocery store. Not only is it high in fiber, it is said to help with resolving anemia issues and building stronger bones. Why not give this simple recipe a try and add this recipe to your list of side dishes?

Time: 20 minutes Servings: 4

Ingredients

  • 300 grams gawar phali / cluster beans
  • 1 small onion, diced fine
  • 1 tablespoon oil
  • 1 teaspoon carrom seeds (ajwain)
  • 2 tomatoes, finely diced
  • 3 pods garlic, minced
  • 1 teaspoon ginger, finely minced
  • 1/2 teaspoon haldi (turmeric) powder
  • 1/2 teaspoon red chili powder
  • 1 teaspoon dhania powder (coriander)
  • 2 tablespoon coriander leaves chopped (hari dhania)

Method:

  • In a pan, heat the oil. Add the carrom seeds and let it splutter, and then add the onion, ginger and garlic. Cook till the onions are translucent.
  • Add the tomatoes, chili powder, coriander powder, and turmeric powder. Saute on medium flame, until the tomatoes are mushy.
  • Add salt to taste, one-third cup water, cover and cook on medium flame for about 12 minutes. Remove the lid and sprinkle the coriander leaves.
  • Serve hot with chapatis

Mediterranean Flatbread (Za’atar flatbread)

This past summer, we stopped by Abu Dhabi enroute to India. It was a few days of beautiful sights and the most delicious middle eastern food. The Za’atar on tender bread reminded Nilesh of his days growing up in the middle east. He couldn’t stop talking about those flavors even after a month so this afternoon, we stopped by a Lebanese grocery store, picked up some Za’atar spice and gyros bread and used our home grown tomatoes to make some scrumptious Middle Eastern flatbread.

What’s Za’atar? It’s a herb and spice mix that tastes a bit nutty, savory and crunchy. The herb, originally is a herb called hyssop, although in the US, oregano or thyme replace it. The spices are a combination of sumac, coriander seeds and sesame seeds.

Benefits of Za’atar: In some parts of the middle east, there is a belief that Za’atar makes the mind alert and is also used to prevent or eliminate internal parasites. It’s also known to sooth inflammation, boost skin health and build strong bones. No wonder, Lebanese kids are encouraged to have it for breakfast. You can drizzle it over vegetables, avocado on toast, or mix it up with olive oil for use on a pizza/flatbread.

Cook time: 10 mins. Prep time: 5 mins

Servings: 2

For the pizza

  • 2 pitas or naans
  • 1 large tomato cut into half and then sliced
  • 1 tablespoon olive oil
  • 1 tablespoon Za’atar spice mix

Tahini Sauce for drizzle

  • 1/2 cup Tahini (sesame paste)
  • 1/4 cup Greek yogurt
  • 1 tablespoon lemon juice
  • 1 clove garlic, minced
  • 1/4 tsp salt
  • 8 tablespoons cold water

Method for Tahini sauce:

Blend all ingredients together to form sauce. Add extra water for desired consistency.

Method for pizza: (Oven/ Foodi/ Air fryer options)

  • Preheat Foodi or Air Fryer with air fryer option to 375 degree Farenheit or Oven to 400 degrees
  • Mix Za’atar and olive oil and brush the mix on the pita
  • Layer tomato slices
  • Cook in air fryer or over for 10 mins
  • Remove and drizzle with tahini sauce to serve

Broccoli Beef

Why get take out when you can quickly dish up a quintessential Chinese takeout dish in minutes? This one-pan, 30-minutes dish is loaded with tender broccoli and nutrition-packed beef cooked in a delicious sauce. Serve over rice for a delicious meal!

Broccoli Beef originates from a Chinese dish called Gai Lan Chao Niu Rounor or Chinese Broccoli Fried Beef. However, early immigrants could not find Gai Lan in the US, and American broccoli became an easy substitute, right around when broccoli was getting more popular in the US too. Given the ability of the broccoli to absorb delicious flavors of the sauce and the tender slices of beef, it’s no wonder it makes its way onto every Chinese restaurant menu.

Servings: 4

Time: 30 minutes

Ingredients:

  • 3 Tablespoons cornstarch, divided
  • 1 teaspoon baking soda or tenderize the meat by hammering it with a meat mallet)
  • 1  pound flank steak, cut into 1-inch pieces. (Find the grains of the beef and cut against it. After cutting rinse off the blood and set aside)
  • 1 small onion, diced
  • 1 tablespoon garlic, minced
  • 1 tablespoon ginger, minced
  • 1 tablespoon oyster sauce
  • 1/4 teaspoon pepper powder
  • 1/2 cup low sodium soy sauce
  • 3 Tablespoons packed light brown sugar
  • 2 Tablespoons sesame or vegetable oil, divided
  • 4 cups small broccoli florets
  • 1/4 cup carrot, cut into matchsticks (optional)

Method

  • In a large bowl, mix 2 tablespoons of the cornstarch with water to form a slurry. Add beef to the bowl and toss until the beef is well coated with the cornstarch mix.
  • In a separate bowl, mix together the remaining 1 tablespoon of cornstarch along with soya sauce, oyster sauce, pepper and brown sugar. Set aside.
  • Heat 1 tablespoon of oil in a large pan or wok on medium flame. When hot, add the beef and fry the beef on one side for 30-60 seconds. Flip and fry the beef until it is cooked through another 60 seconds. Transfer the beef to a plate and set aside.
  • Add remaining oil to the pan and when hot, add the diced onions, garlic and ginger and cook for a minute and then add the broccoli florets and carrots. Cook until broccoli is tender, about 4 minutes.
  • Add the beef back to the pan and pour the sauce over. Stir for another minute until the sauce thickens.
  • Turn off the stove and serve with a side of rice or noodles.

Chicken with lemon-caper sauce

A healthy dish that comes together in a flash for a weeknight dinner but with its restaurant- quality look and flavors it’s perfect for when guests stop by. The tart, briny and lemony flavors will have you licking the plate clean. You may want to double up the servings as you will be craving this again the next day!

Dairy and nut free.

Servings:4

Prep time: 4 minutes. Cook time: 15 minutes

Ingredients

  • 1/4 cup flour (whole wheat or all purpose)
  • 4 – 5oz boneless, skinless /skin-on chicken thighs
  • 1/2 tsp black pepper powder
  • 1 tsp Italian seasoning (preferably no salt)
  • 1 tsp finely chopped garlic
  • 2 tsp olive oil
  • 1.5 tbsp capers, drained
  • 1 tbsp chopped parsley
  • 1 cup chicken broth
  • 2 tbsp lemon juice
  • 1/2 cup water
  • 1 tsp cornstarch (mix in a quarter cup of water)

Method

In a plate, mix together the flour, black pepper powder, Italian seasoning. Coat chicken with the flour mixture, and shake off excess.

In a skillet, heat oil, on medium flame. When hot, add garlic, and cook garlic for 30 seconds.

Add the chicken to the pan and cook. After 5 minutes, turn chicken over, and continue cooking until brown on both sides and cooked through for another 5 minutes. Should take about 10 minutes to cook on both sides. Remove from skillet and set aside

Add the chicken broth to the skillet and bring to a boil. Add in the water and the cornstarch slurry (cornstarch water mix). Continue cooking for about 2-3 minutes until the sauce is thickened. Add chicken back to the skillet, cover and simmer for about 2 minutes. Remove the lid and stir in lemon juice, capers and parsley. Turn off the stove. Divide amongst four plates, spooning the sauce over the chicken.

Serve chicken in lemon-caper sauce with a side of beans and mashed potatoes! Yum!!

Kheema – ground turkey, beef or chicken

Kheema is a staple Indian dish and just so versatile. Nilesh, as a bachelor, made a huge pot of kheema and had it with pasta, with chapatis, or rice..he almost always seemed to be having kheema for a meal. Now we also use it in patties, empanadas, shepherd’s pie, and potato chops. Make a large pot and then package it into ziplock bags, frozen for another day and another dish!

This is my mum’s recipe. The secret ingredient which made her dish stand out was the addition of vinegar and sugar! You won’t be disappointed.

Servings:6

Ingredients:

  • 1 lb ground turkey (or other meat – cooking time for non turkey options will vary )
  • 3 tbsp oil
  • 2 large onions
  • 2 tbsp ginger, minced fine
  • 2 tbsp garlic, minced fine
  • 2 heaped tsp coriander powder
  • 1 tsp black pepper powder
  • 1 heaped tsp garam masala powder
  • 1 tsp chili powder
  • 2 tsp cinnamon powder
  • 3 tbsp apple cider vinegar
  • 2 tsp sugar
  • 2 tbsp kasuri methi (optional)
  • 1/2 cup chopped fresh cilantro

Method:

  • Heat oil in a large pan
  • When oil simmers, add in the chopped onion, garlic and ginger
  • Turn the flame to low and stirring occasionally, let the mix cook 3 minutes until onions are translucent and soft
  • Add spices (except vinegar, salt and sugar) and fry for 1 minute on low flame
  • Add the meat, fry for 5 minutes
  • Add the vinegar, salt, sugar
  • Cook for 15 mins on low flame
  • Sprinkle in kasuri methi and cilantro, stir and cook for another minute
  • Serve hot with chapatis. Use leftovers to make shepherd’s pie or potato chops

Lentils with spinach – dal palak

This nutritional lentil dish packs an additional punch thanks to the addition of spinach. It’s vegetarian, gluten free and low fat giving you all the benefits of lentils (good protein, digestive health, weight loss etc.) and spinach (weight loss, eye health, anticancer and immunity boosting). Have it as a soup, over rice or scoop it up with a chapati.

Servings: 4. Time: 20 minutes

Ingredients:

  • 1 cup toor dal (split pigeon peas or yellow lentils)
  • 1 tablespoon ghee (or olive oil)
  • 1 teaspoon mustard seeds
  • 1 teaspoon cumin seeds
  • 5 garlic cloves minced fine
  • 1 tablespoon ginger, diced fined
  • 1 large tomato, chopped
  • 2 cups baby spinach
  • Juice of 1 large lime
  • 1/2 teaspoon turmeric powder
  • 1/2 teaspoon red chilli powder
  • Salt to taste
  • 2 cups water

Method:

  • Start the instant pot or pressure cooker or ninja foodi in Saute mode
  • Heat the oil/ghee
  • Add in the mustard seeds, cumin seeds and let them splutter for 10 seconds
  • Add garlic, let it splutter for 10 seconds
  • Add chopped tomatoes, spices and fry for 30 seconds
  • Add in the lentils, stir and add in water
  • Close lid of cooker and change mode to pressure cook
  • Pressure cook for 15 minutes
  • Let the pressure release naturally
  • Open the lid and add in the spinach and lime juice. Stir well and let us rest for 3-4 minutes, covered. The spinach will melt
  • Serve as a soup, over rice or with chapatis

Barbecue pulled pork – slow cooker/ Ninja Foodi /oven

Pulled pork simmered in a tangy, sweet and spicy sauce bringing back memories of a roadtrip  down to Texas where we had the most delicious and moist pulled pork – in the parking lot of a restaurant because of Covid. As we reminisced over the trip, we had to replicate the flavors at home.

Servings: 8 (for 8 sandwiches)

Prep time: 10 minutes. Cook time: 6 hours

Ingredients

  • 1 teaspoon oil
  • 1.5 large onions, chopped
  • 3 large garlic cloves, minced
  • 4 lbs pork shoulder butt roast
  • 1/2 cup apple cider vinegar
  • 1 tablespoon  Worcestershire sauce
  • 1 tablespoon prepared yellow mustard
  • 1 tablespoon  red chilli powder
  • 1 teaspoon pepper powder
  • 2 teaspoons salt
  • 1/4 dark brown sugar
  • 1/2 cup chicken broth
  • 1/2 cup ketchup
  • 1/2 cup barbecue sauce (see notes to make barbecue sauce at home)

Method

  1. Lightly rub the pork with salt and pepper
  2. If using a Ninja Foodi, put on the sear option on high
  3. Pour the oil into the bottom of a slow cooker, dutch oven or the Ninja Foodi
  4. Add the onions, garlic
  5. Add the remaining ingredients including the pork
  6. Cover the container to cook:
    1. Turn on the slow cooker and set for high
    2. For Foodi, switch to slow cooker option and set to high
    3. For oven, preheat to 250F. Cover dutch oven and place in oven
  7. Cook on high for 5-6 hours until the pork shreds easily with a fork
  8. Remove the pork from the slow cooker and shred the meat using two forks
  9. Return the shredded meat to the slow cooker, and stir the meat with the juices in the pot
  10. Serve on hamburger buns with a side of beans, coleslaw and potato salad

Notes:

  • Home made barbeque sauce:
    • Ingredients:
      • 1.5 cups ketchup
      • 2 tablespoon molasses
      • 3 garlic cloves minced
      • 1/4 cup dark brown sugar
      • 1/4 cup apple cider vinegar
      • 1 tablespoon red chilli powder
      • 1  teaspoon black pepper powder
      • 1 teaspoon prepared mustard
    • Method
      • Combine ingredients in a pot on the stove. Simmer for 15- 20 minutes until sauce has deepened in color. Store in a tightly covered lid for upto 10 days

Mushroom, Spinach and Black Bean Quesadillas

When you want a healthy and yet quick meal or a snack on-the-go, these quesadillas are a great option. A mix of spinach, corn, mushrooms, black beans, onions, and creamy avocado makes for a filling, delicious vegetarian meal. And if you’re craving meat, just add some shredded chicken to the mix.

Servings: 4 quesadillas Cook and prep time: 20 minutes

Ingredients:

  • 1 tbsp Olive Oil
  • 3 cloves Garlic, minced
  • 1 large Red Onion, diced
  • 1/2 tsp Red Pepper flakes
  • 8 oz Baby Bella mushrooms, thinly sliced
  • 3 cups fresh Spinach
  • 1/2 cup frozen Corn
  • 1/2 cup cooked Black Beans
  • 2 large Avocados, removed from shell and thinly sliced
  • 2 cups shredded cheddar or mozzarella cheese
  • 4 medium Tortillas (I use whole wheat although flour tortillas are usually tastier but less healthy)
  • Salt to taste
  • Salsa, for serving
  • 2 cups shredded chicken, optional (for when you want a non-vegetarian option)

Method:

  • In a pan, heat the Olive oil
  • When oil is hot and shimmering, add in the garlic and red pepper flakes. Stir and add in the onions, stir occasionally while the onions turn translucent.
  • Add in the sliced mushrooms. Fry the mix, stirring occasionally, until the mushrooms are tender and caramelized, and the water from the mushrooms in the pan has dissipated – approximately 3-4 minutes
  • Add in the spinach, black beans and corn. Cook till spinach has wilted. Sprinkle salt, stir and keep aside
  • Lay out the four tortillas on plates
  • Cover a half of each tortilla by distributing the 1 cup of cheese across the tortillas
  • Distribute equally the spinach, corn, black beans, and mushroom mix over the cheese
  • Layer the mix with equal amounts of avocado slices and sprinkle the remaining cup of cheese evenly over it, as well
  • Fold tortilla into half by pressing the empty half of the tortilla over the toppings
  • Heat a medium/large size skillet. When skillet is hot, place the folded tortilla in the skillet. Cook on both sides for a total of 4 mins, flipping half-way through
  • Before serving, cut the quesadillas into 3 equal sizes
  • Serve hot with a side of salsa
  • Enjoy!

Tuvar Dal (Pigeon-Pea lentils)

While growing up, dal, or lentils, was a staple part of a meal. Tuvar dal, moong daal, chana dal, it didn’t matter. There were so many different recipes, and all were so nutritious and delicious. When you were sick, you had a simple dal soup, and on occasions, you had some more complex recipes. This recipe is a staple in our home. It’s flavorful and can be just had with rice. On some days, the perfect accompaniment to dal and rice is fried fish, stuffed with red masala…..but more on that fried fish later!

Prep time: 10 minutes Cooking time: 15 minutes Total Time: 25 minutes

Servings: 4

Ingredients:

  • 1 tbsp vegetable oil
  • 3/4 cup tuvar/tur dal rinsed
  • 3/4 tsp mustard seeds
  • 1 tsp cumin seeds
  • 1 large tomato, chopped into small pieces
  • 1 medium onion, diced fine
  • 1 tsp minced ginger
  • 1 tbsp minced garlic
  • 1 tsp turmeric powder
  • .5 tsp red chili powder
  • .5 tsp garam masala powder
  • .5 tsp cumin powder
  • 1 tsp coriander powder
  • 1/4 cup chopped fresh coriander leaves
  • Salt, to taste
  • Optional: 1 tsp lime juice

Method:

  • In a pressure cooker, or Ninja Foodi or Instant Pot (both on sear setting) heat oil
  • When oil is hot, add the cumin seeds and mustard seeds, they will splutter
  • Add in the onion, ginger and garlic and fry for 2 minutes until onions are soft and translucent
  • Add in the tomato and fry for 2 minutes
  • Add in the dry powders and stir for another minute
  • Add in the dal and 2.5 cups of water along with the salt
  • Put the pressure cooker lid on (for Foodi or Instant Pot, turn setting to Pressure cook and put timer to 16 minutes)
  • Pressure cook for 16 minutes
  • When done, wait until the lid can be safely removed. You can change the consistency of the daal by adding more water
  • Stir in the cilantro leaves (and lime juice, if using) and serve with rice or chapatis

Sesame Garlic Bok Choy

A delicious, crisp vegetable that comes together in minutes. Bok Choy, a Chinese cabbage, can be braised, stir-fried or roasted. You can eat all of it, which reduces prep work. It has a crisp texture with a slightly nutty flavor.

Bok choy is 90% water, negligible fat and full of vitamins A, C and beta carotene. Pair it with soy sauce, sesame seeds, chili flakes, ginger and garlic, and you have a flavorful side on the table.

Sometimes bok choy is harvested when not yet mature and sold as baby bok choy. It’s usually 3-6 inches in length, sweeter and can be cooked whole.

Servings: 4

Ingredients

  • 1.5 lb baby Bok Choy (quartered or halved)
  • 1 small White Onion (diced fine)
  • 2 tbsp Sesame Oil
  • 1 tsp Sesame Seeds
  • 1 tsp Red Pepper flakes
  • 2 tbsp Soy Sauce
  • 5 large Garlic cloves (minced)
  • 1 tsp Ginger (minced)

Method:

To clean Boy Choy: Under running water, rub off any dirt from the leaves and especially at the bottom of the stalks. Chop the boy choy into quarters or halves. Place them in a bowl until you are ready to cook.

To cook: In a large skillet, heat the sesame oil. Add the garlic and red pepper flakes and cook for 10 seconds. Add in the onions, and ginger and cook over high heat until fragrant, 20 seconds. Add the bok choy and stir-fry until the leaves start to wilt, 2 minutes. Add in the soy sauce and sesame seeds. Stir for about 20 seconds. Remove the bok choy from the heat and serve.


Mediterranean Chickpea and eggplant

The Mediterranean diet focuses heavily on nuts, fish, fruits and vegetables resulting in lower inflammation and better heart health. When we visited Greece, we enjoyed the salads, vegetarian dishes and pan-seared aardines. Even the simple tomato just seemed a lot more delicious. This chickpea and eggplant dish aims to bring back those memories. It includes eggplant, known for its vitamins and antioxidants with chickpeas, which keep you full longer because it’s full of fiber. The combination of those two in a simple tomato sauce is luscious and hearty.

Servings: 4

Time to cook including prep time: 20 minutes

Ingredients

  • 3 cups eggplant (1 large), chopped into chunks
  • 1.5 cups chopped tomatoes
  • 1/4 cup tomato sauce
  • 1 small yellow onion, finely diced
  • 1/4 tsp cumin powder
  • 1/2 tsp red chili powder
  • 1/4 tsp nutmeg powder
  • 1/4 tsp pepper powder
  • 2 Cups chick peas
  • 1 tbsp olive oil
  • 1 tbsp garlic
  • Salt, to taste
  • 1/4 cup parsley chopped

Method

  • In a large frying pan, heat oil
  • Add onions and fry until translucent
  • Turn flame to medium heat
  • Add garlic and fry for a minute
  • Turn heat to low
  • Add in the chili powder, nutmeg powder, pepper powder, cumin powder. Give it a stir
  • Add in the tomatoes, tomato sauce and eggplant. Cover the pan and on low flame, cook till eggplant is soft, about 10 minutes
  • Add in the chickpeas. Sprinkle salt and stir gently. Cook another minute.
  • Sprinkle the parsley and turn off the stove
  • Serve with a side of couscous or a salad

Salmon with  Tamarind- Mushroom- Red Pepper Sauce

This aromatic, sweet and tangy sauce complements salmon. Not only is it a healthy, quick and easy dinner option, it is an elegant  meal for when you have company.

Serves:4

Ingredients

  • 1 lb skin-on, boneless salmon filet
  • 8oz baby bella mushrooms, diced into small pieces
  • 1 large red pepper, diced into small pieces
  • 1/4 large red pepper, cut into thin red strips
  • 2 stems green onions, diced fine
  • 1 tbsp ginger, diced fine
  • 1 tbsp garlic, diced fine
  • 2 tbsp size chunks of seedless tamarind (see method below)
  • 1 tbsp fish sauce
  • 1 tbsp soya sauce
  • 2 tbsp sugar
  • 2 tbsp vegetable oil
  • 1/4 fresh coriander leaves, chopped
  • For the fish before grilling or pan frying
    • 1/2 tsp salt
    • 1/2 tsp pepper powder
    • 1 tbsp vegetable oil (2 tbsp if frying)

Method

  1. To make tamarind, soya and fish sauce mix:
    • Take a large marble sized piece of seedless tamarind
    • Put tamarind into a microwave safe bowl and add in 1/4 cup warm water. Heat for a minute in the microwave. Rest for 2 minutes. Then mash the pulp with the back of a spoon, forcing it through a strainer . Scrape off the paste that is on the underside of the strainer. Discard the solids left in the strainer
    • To the tamarind mix in the bowl, add fish sauce, soya sauce, sugar and blend well till sugar dissolves
  2. For the mushroom – red pepper sauce
    • Dice mushrooms and red pepper into small pieces
    • In a wok, heat oil
    • When hot, add in the garlic, stir fry for 30 seconds and add in the ginger
    • Stir fry for 30 seconds
    • Add in the mushrooms and stir fry for 3-4 minutes until the water from the mushrooms dry out
    • Add in the tamarind, fish sauce mix and stir fry for 1 minute
    • Add in the green onions, and diced red pepper and stir fry for another minute
    • Remove from heat and set aside
  3. Fish
    • To cook in Ninja Foodi: 
      • Place water into Ninja Foodi pot. Season salmon with salt and pepper on both sides, no oil, on rack, making sure the rack is in the higher position.
      • Assemble pressure lead, making sure the pressure release valve is in the SEAL position
      • Select PRESSURE and set to HIGH. Set time to 2 minutes. Select START/STOP to begin
      • When pressure cooking is complete, quick release the pressure by moving the pressure cooker valve to the VENT position. Carefully remove lid when pressure is released
      • Gently pat salmon dry with paper towel, then close with crisping lid
      • Select BROIL and set time to 7 minutes. Select START/STOP to begin, check for doneness after 5 minutes
    • To grill on a regular grill:
      • While the sauce is cooking, marinate the fish with oil, salt and pepper. Rub mixture on both sides of fish. Heat grill to 450 degree F. When hot, grill the salmon skin side down over direct heat with the lid closed, for about 4-5 minutes and then turn the salmon over, close the lid and another 4-5 minutes
    • To pan fry:
      • Rub salt on both sides of the fish. Heat oil in a pan. When hot, add fish, skin side down and fry for about 4 minutes on each side
  4. Serving
    • Serve fish while hot, with the Mushroom-Red Pepper sauce spooned over it, garnished with red pepper slivers and cilantro. It can be accompanied by vegetables like bok choi or broccoli as well as steamed rice

Thai yellow curry

This mild, yet complex Thai curry impresses with its pleasant and interesting flavors.

When we have guests, Thai or Mexican dishes are usually our go-to. Quick, flavorful, and enjoyed by most, it’s definitely faster to pull together than Indian food. When we do make Thai dishes, curries take center-stage and this yellow curry, is a mildly spicy delicious alternative to the ubiquitous red curry.

This curry can be made in advance, I prefer to, as I find it tastes even better. It has lots of sauce and can be re-heated very easily.

Servings: 4

Ingredients

  • 10 oz boneless, skinless chicken breast (optional if vegan, see note)
  • 1 can coconut milk
  • 1 can Thai yellow curry paste or the paste made with this recipe
  • 3 kefir lime leaves
  • 3 tbsp fish sauce (alternatively, 3 tbsp lime juice if vegan)
  • 1 tsp sugar
  • 1 can bamboo shoots
  • 1 medium sized Chinese eggplant, cut into thin long slices
  • 3 tbsp green peas
  • 1/2 medium red pepper, cut into thin strips
  • 1 large red potato (or white) cut into small cubes
  • 1 small yellow onion, diced fine
  • 1/4 cup cilantro, chopped roughly
  • 1/4 red pepper strips, cut into thin strips for garnish
  • 1 tsp vegetable oil

Method

  • Slice chicken breast into thin, long slices ( 3 inch long, 1 inch wide and 1/4 inch thick)
  • Heat oil in a large frying pan or wok
  • Add in the onion, and stir fry for 2 minutes
  • Reduce heat to medium. Add in the yellow curry paste and stir fry for 1 minute
  • Add in the potato cubes and stir fry on low flame for 2 minutes
  • Add in half the can of the coconut milk, stir to dissolve the paste in the coconut milk and bring to a boil
  • Add the remaining cup of coconut milk, raise the heat to medium and let it cook for 10 minutes. You will start to see the oil from the coconut milk raise to the top
  • Tear the lime leaves to halves and add to the sauce. Cook for another 2 minutes, the sauce will thicken
  • Add chicken and egg plant into the sauce, turn heat to maximum, cook for a minute
  • Add 1/2 cup water and let the curry boil for a minute
  • Add fish sauce and sugar and turn heat to medium. Stir for 2 minutes
  • Add in bamboo shoots, red pepper strips and cook for 2 minutes
  • Add in the peas and 3/4 of the chopped cilantro
  • Stir fry for 2 minutes
  • Serve hot, topped with remaining cilantro leaves and a few red pepper strips with a side of rice

Thai yellow curry paste

Made from scratch, this recipe beats canned curry pastes. When time is not of the essence, prepare this paste and then make a delicious Thai curry. Serve it over rice and then enjoy the afternoon siesta!

Ingredients:

  • 14 dried thai chilis
  • 2 tbsp fresh turmeric root, grated (or 2 tsp turmeric powder)
  • 2 tbsp galangal or ginger, peeled
  • 1/2 cup cilantro stems
  • 1 tsp coriander powder
  • 1 tsp cumin powder
  • 6 kefir lime leaves or 1 tsp grated lime
  • 6 large garlic cloves, diced fined
  • 4 small shallots peeled and roughly chopped
  • 1/4 tsp white pepper powder
  • 2 lemon grass stalks, bottom half only, chopped
  • 1 tbsp shrimp paste, omit if vegetarian
  • 1 tsp oil, set aside for later

Method:

  • With a mortar and pestle or in a blender, mix all the ingredients (except oil)together. Grind until you have a smooth paste
  • In a frying pan, heat the oil and on low flame , slowly cook the paste for about 3 minutes
  • Use to make a Thai yellow curry

Vino Dosh – The Portuguese version of Pork Vindaloo

One of my favorite dishes – hot and spicy Vindaloo is a Goan dish that my mom made for parties, a special Sunday meal or festivals. The original Portuguese version is anything but spicy but nevertheless this “meat in garlic marinade” packs a punch of flavor. The longer it marinates, the better it tastes. Make this in the Ninja Foodi, Instant Pot or in the oven.

Ingredients:

  • Prior to cooking – 3-4 days ahead
    • 3 pounds pork shoulder (boneless) – chopped into 1.5-inch cubes
    • 10 cloves of garlic – peeled and minced fine
    • 3/4 cup red wine vinegar
    • 1 cup red wine
    • 10 whole cloves
    • 3 bay leaves
    • 1 tsp red chili flakes
    • 2 tbsp black pepper powder
    • 3 sprigs fresh thyme
  • When ready to cook:
    • 1 large onion chopped into quarters
    • 1/2 cup all purpose flour
    • 2 tbsp olive oil

Method:

  1. Prepare the marinade:
    1. In a bowl, whisk the red wine vinegar, red wine, garlic, cloves, bay leaves, chili flakes, black pepper, and thyme
    2. Pour the marinade into a resealable plastic bag
    3. Add the pork to the bag, massage the marinade into the pork, squeeze out the excess air and seal the bag
    4. Marinate in the fridge for 3-4 days, turning occasionally. Each time, massage the pork gently in the bag
  2. Ready to cook – in the Ninja Foodi or Instant Pot
    1. Press the sauté button and add in the olive oil
    2. When oil is hot, add the onion and the pork (minus the marinade) and stir-fry for about 4 minutes, browning the meat on all sides
    3. Add the marinade, close using the pressure cooker
    4. Secure the pressure cooker valve, select the pressure cooker option and cook for 25 minutes on high pressure
    5. Naturally release the pressure
    6. Open the lid, and select the sauté button
    7. Stir in the all purpose flour, slowly to avoid lumps
    8. Cook for 5-8 minutes until it thickens to a stew-like consistency
    9. Serve with Hawaiian bread
  3. Ready to cook – in the oven:
    1. Heat the oven to 325 degrees F
    2. In a Dutch pan, heat the oil
    3. Add onion and pork pieces (minus marinade) and stir-fry for about 4 minutes, browning the meat on all sides
    4. Add the marinade and bring to a simmer
    5. Add in the flour, slowly, stirring to avoid lumps
    6. Cover with oven-safe lid and put the dish in the oven
    7. Cook for 1.5 hours – the meat should be tender to a fork
    8. Remove from oven, remove the bay leaves and thyme springs and discard
    9. Serve with Hawaiian bread

Chipotle Black Beans

To soak or not to soak? The kids want to take burritos to school and I don’t have time to soak beans. Sure I can make it without beans but beans add a lot more protein and nutrition. What to do? A no-soak option gives me delicious, smoky beans within an hour.

The options below include the method if you did soak your beans overnight.

Ingredients

  • 1 cup dry black beans
  • 1 tsp garlic powder or 1 tbsp finely chopped garlic
  • 2 tsp lime juice
  • 2 tsp crushed chipotle pepper with sauce
  • 1 tsp cumin powder
  • Salt, to taste
  • 1/4 cup cilantro, for garnish
  • Optional garnish: red onions, avocado

Method

  • Wash the beans and remove any debris
  • Put beans and 2 cups water in a pressure cooker-safe container and pressure cook on high for 30 mins and slow release for 15 minutes
  • If you did soak your beans for atleast 6 hours, pressure cook beans for 15 minutes
  • Garnish with cilantro

Mexican chicken casserole

How do I get easy, and healthy meals on the table on a weeknight? Mexican, Thai, Chinese are usually my go to dishes. This Mexican Chicken casserole dish is a multi-purpose one. I either roast a chicken on the weekend or buy one from Costco. Make this dish using rotisserie chicken and you can have dinner on the table in under 30 minutes. And best part, use the left overs for burritos and quesadillas in the lunch box the next day!!

Servings: 4

Time including prep time: 25 minutes

Ingredients

  • 1 yellow onion
  • 1 tsp vegetable oil
  • 1 tbsp garlic, finely minced
  • 4 Cups chicken, cooked and shredded
  • 1 cup green peppers, diced
  • 1/2 cup red peppers, diced
  • 1 cup black beans (can or soak overnight and cook first)
  • 1 cup corn
  • 2.5 cups salsa (medium or spicy)
  • 1 tsp cumin powder
  • 1/2 tsp chili powder ( optional)
  • 1.5 cups shredded Colby Jack cheese (or Mexican blend)

Garnish

  • 1 cup sour cream (I use Greek Yogurt as a healthier alternative)
  • Guacamole
  • Green onions

Method:

  • Heat Ninja Foodie on Sear function
  • Add oil
  • When hot, add in the onion and garlic
  • Stir fry for a minute
  • Add in the green peppers and red peppers, stir for another minute
  • Switch off Foodi
  • Add in the beans, chicken, corn, salsa, cumin and chili powder. Mix well
  • Sprinkle the cheese on the top of the mix
  • Close the lid of the Foodi and turn on the Bake function. Bake at 350F for 5 mins or until cheese is melted
  • When done, turn off the Foodi
  • Serve garnished with onions, sour cream and guacamole. Optionally, serve with a side of Mexican rice or in a tortilla as a burrito.

Sauteed Spinach with oranges and almonds

Sauteed spinach gets a nice twist with the addition of garlic, orange segments and almonds. Another easy, healthy, quick week night option that takes less than 10 minutes to get to the table. And you won’t regret this approach to getting greens into your diet!

Servings: 4

Prep time: 2 minutes Cook time: 4 minutes

Ingredients

  • 1 tbsp olive oil
  • 1 pound baby spinach leaves, washed
  • 2 big garlic cloves, minced
  • 1/2 tsp red chili flakes
  • 1 small navel orange, peeled, and each segment cut into three
  • 4 almonds slivered
  • Salt, to taste

Method

  1. Heat the olive oil in a pan
  2. When oil is hot, add the chili flakes and garlic, let sizzle for about 30 seconds
  3. Add the spinach in heaping batches, stirring as you go
  4. Add in the orange and almond slivers
  5. Toss till all spinach has wilted about 3 minutes
  6. Add salt, if needed, and according to taste
  7. Serve hot


Sauteed cabbage

My nana Helen had the simplest of vegetarian recipes but they were always absolutely delicious so much so that even as kids we enjoyed eating the vegetables she cooked. This dish is one of those…simple, vegan, low sodium, low carb and full of flavor. Try this and you will be rethinking cabbage!

Servings: 6

Ingredients:

  • 4 cups Cabbage, finely chopped
  • 1 cup Carrot, diced
  • 1/2 cup Green Peas (I used frozen)
  • 1 small Red Onion, finely chopped
  • 1 medium tomato, chopped
  • 1 tbsp Oil
  • 1/2 tap Turmeric Powder
  • 1 Tbsp Lemon /Lime Juice
  • 1/2 tsp Mustard Seeds (see note)
  • 1/2 tsp Cumin Seeds (see note)
  • 1/2 tsp Red Chili flakes
  • 1/4 cup Fresh Cilantro, chopped
  • Salt, to taste (optional for low-sodium recipes)

Note: this dish tastes delicious even without mustard and cumin seeds and I’ve made it with and without those two ingredients

Method:

  1. In a work or large pan, heat oil
  2. When oil is hot, add in the mustard seeds, cumin seeds and red chili flakes
  3. When they splitter, add in the onions
  4. Turn flame to medium, saute the onions for 1-2 minutes until the onions turn soft and translucent
  5. Add the cabbage, tomato and carrots. Stir. Add the turmeric and salt
  6. Turn flame to low. Cover and cook for 2 minutes
  7. Remove lid and add the green peas. Cover the pan again and cook for 2 minutes
  8. Remove the lid, add the lime juice and cilantro, stir and then turn off the flame
  9. Serve hot with naan, chapatis or with my mom’s pilaf

Sticky chicken thighs

Looking for quick dinner ideas? This sticky chicken thighs recipe is one of those. And because I make it in the Ninja Foodi (that has been such a time saver), a healthy and tasty dinner is on the table in under 30 minutes.

Total time: 20 minutes. Serves:4

Ingredients

  • 1 lb bone-in chicken thighs, fat trimmed (can be with or without skin)
  • For the sauce:
    • 1tbsp sesame oil
    • 1 tsp garlic, minced
    • 1tbsp ginger, minced
    • 1/2 tsp crushed red pepper
    • 4 tbsp soy sauce
    • 2 tbsp brown sugar
    • 2 tbsp hoisin sauce
    • 1 tbsp sweet chili sauce
    • 2 tbsp honey
    • 1/2 tsp sriracha sauce (optional if you dont like it too spicy)

Method

  1. Pour 1 cup water in the Ninja Foodi pot
  2. Place reversible rack in the pot, making sure rack is in the higher position
  3. Arrange chicken thighs , skin side up on the rack. Assemble pressure cooker making sure release valve is in the Seal position
  4. Select Pressure and set to high. Set time to 5 minutes. Select Start/Stop to begin
  5. While chicken is cooking, in a bowl, stir together the ingredients listed under the sauce and set aside
  6. When pressure cooking is complete, quick release the pressure by moving the pressure release valve to the Vent position. Carefully remove lid when the unit has finished releasing the pressure
  7. Gently move the skin to the side and brush both sides of the chicken with the sauce
  8. Close crisping lid. Select Broil and set time to 5 minutes. Select Start/Stop to begin
  9. At 5 minutes, open lid and baste with the two tbsp of sauce that was set side. Close lid, select Broil and set time to another 5 minutes. Select Start/Stop to begin
  10. When cooking is complete, serve chicken topped with spring onions on a bed of rice and with a side of steamed vegetables of stir fried green beans

Spicy Mustard Sauce

A delicious sauce to have on hand – on sandwiches, with roast meat, or just a dipping sauce.

Ingredients

  • 1/3 cup apple cider vinegar
  • 1/4 cup dark brown sugar
  • 2/3 cup Dijon mustard
  • 2 tbsp hot sauce
  • 1 tsp Worcestershire sauce

Method:

Whisk ingredients. Serve at room temperature


Healthy Chorizo Burrito Bowl

This Chorizo Burrito Bowl while packed with Mexican flavors, is a healthier than any version you’ll get in a restaurant but still just as delicious! Not only is it healthy, it’s a quick, delicious meal. Home-made chorizo takes center-stage on a bed of Cilantro Lime Rice along with tomato salsa, corn, black beans, lettuce, and so creamy guacamole. Pack it for lunch or get a quick dinner on the table, it’s a guaranteed favorite.

Ingredients:

  • 1 cup – Lettuce, shredded
  • 1 tbsp – lime juice
  • Salt, to taste
  • 1 cup – Cooked Chorizo
  • 1 cup – Cooked Black Beans (see linked recipe for home cooked black beans or use canned – just rinse before using)
  • 2 cups – Cilantro Lime Rice
  • 1/4 cup – Queso Fresco cheese (I avoid it to keep it healthier, but use it for the kids)
  • 1/4 cup – Greek yogurt (replacing sour cream with yogurt makes it healthy while providing the same, delicious, creamy flavor
  • 1/4 cup – Pico de Gallo
  • 1/4 cup – Corn Salsa
  • 1/4 cup – Guacamole

In a rush: You can make it easier by using store bought chorizo (I have used V&V Supremo brand when in a pinch), and canned black beans – just rinse it out before using.

Method:

  1.  In a bowl, combine cabbage, lime juice, and salt . Combine and refrigerate until needed
  2. To serve:
    1. Layer each serving bowl with half a cup of the Cilantro Lime rice. Top rice with black beans, Chorizo, lettuce, cheese, yogurt, pico de gallo, corn salsa and guacamole, spreading it evenly across the bowls.
    2. Enjoy!

Note:

  1. If using store-bought chorizo, it will need to be cooked
    • Heat a pan and add 1 tbsp of oil
    • When oil is hot, add 1/2 a chopped onion. Fry onion for 2-3 minutes and then add chorizo.
    • Sauté for 7-8 minutes on a medium flame, stirring and breaking the meat up with the spatula, until it is fully cooked through and meat turns from bright red to reddish-brown

Black Beans

Tender, delicious black beans for just about any dish that calls for black beans like burritos, or a Burrito Bowl or Santa Fe Chicken. Yes, takes longer than beans from a can but so much better for you. Black Beans are full of protein, fiber, folate and magnesium. Cook up a pot and have them ready for soups, salads or just a side.

Servings: 6 cups when cooked

Time – if using a Pressure Cooker: 5 minutes prep time + 25 minutes cook time; if using stove top: 5 mins prep time + 1 hour cook time

Ingredients:

  • 1 lb dried black beans
  • 1 small red onion, diced fine
  • 4 cloves garlic
  • 2 bay leaves
  • 1 tbsp olive oil
  • 1 tbsp cumin powder
  • 1/2 tsp red chili powder
  • 1 tbsp lime juice
  • 2 tbsp finely chopped cilantro
  • 6 cups water

Method:

  • Rinse the black beans twice, throwing out the water after each rinse
  • Pressure Cooker Method:
    • Next day, in a pressure cooker, heat the olive oil
    • When oil is hot, add in the bay leaves. Once leaves splutter, add in the garlic and onions. Stir for a minute and then add in the cumin powder, chili powder, beans along with the water
    • Close the pressure cooker and close steam valve. Set to high pressure for 25 minutes total. Then allow the pot to naturally release steam for 15 minutes
    • To serve, stir in the lime juice and cilantro. Add salt and/or adjust seasonings, if needed
  • Stove Top Method:
    • In a large pan, heat the olive oil
    • When oil is hot, add in the bay leaves. Once leaves splutter, add in the garlic and onions. Stir for a minute and then add in the cumin powder, chili powder, beans along with the water
    • Bring the water to a boil then cover with a lid. Reduce the heat to low. Set timer for an hour and let the beans simmer. After an hour, check the beans – they should be plump and easy to press through with a fork. If still tough, continue to simmer in 5 minute increments until soft. If needed, add a little water.
    • When done, turn off the stove.
    • To serve, stir in the lime juice and cilantro. Add salt and/or adjust seasonings, if needed
  • Beans can be used right away in various recipes like a burrito bowl or Santa Fe Chicken stored in fridge for 5 days or in a well-sealed container in the freezer
Burrito Bowl
Santa Fe Chicken

Mexican pork stew

30 mins to get dinner on the table before ravenous kids burst through the door! All I had on hand was some pork in the fridge. A quick combination of pork, and beans in a tomato broth with some spices that are often used in Mexican recipes, resulted in a hearty stew that we enjoyed on a cold winter’s day.

Serves: 4 Total time: 25 minutes

Ingredients:

  • 1 tbsp olive oil
  • 1 lb Bone-in pork loin – cut into small cubes while keeping the bone – adds flavor. Alternatively, 1 lb pork shoulder, small cubes
  • 1 small red onion, finely diced
  • 4 cloves garlic, finely minced
  • 1/2 jalapeno, finely diced
  • 1/2 tsp red chili powder
  • 1 tsp smoked paprika powder
  • 1 tbsp cumin powder
  • 1/2 tsp Mexican oregano powder
  • 1/2 tsp black pepper powder
  • 1 15.5oz can white beans ( I had cannellini, you can use white kidney or pinto beans)
  • 1 14.5 oz can fire roasted diced tomatoes
  • 1 cup chicken broth
  • Juice from 1 lime
  • Salt, if desired
  • 1/4 cup cilantro, chopped

Method:

  • In Pressure cooker:
    • Put oil in pressure cooker
    • When hot, add the onions, garlic and jalapeno. Fry for 2-3 minutes until onion is soft and translucent, stirring occasionally
    • Add the chii powder, cumin powder, smoked paprika, oregano and black pepper powders and stir for a minute
    • Add in the pork pieces and stir to coat the meat with the spices
    • Add in the diced tomatoes, beans and broth
    • Close pressure cooker and pressure cook for 15 minutes
    • When done, let pressure off, remove kid and garnish with the lime juice and cilantro
    • Serve with crusty bread or Mexican Cilantro Lime rice
  • On stove top:
    • In a large, heavy bottom pot, heat oil
    • When hot, add the onions, garlic and jalapeno. Fry for 2-3 minutes until onion is soft and translucent, stirring occasionally
    • Turn flame to medium heat, add the chili powder, cumin powder, smoked paprika, oregano and black pepper powders and stir for a minute
    • Add in the pork pieces and stir to coat the meat with the spices
    • Add in the diced tomatoes, beans and broth
    • Stir, cover and cook on medium-low for about 25 minutes
    • When done, remove from heat and garnish with the lime juice and cilantro
    • Serve with crusty bread or Mexican Cilantro Lime rice

Coconut tilapia curry

While living in Toronto, I was spoilt with some really good Thai restaurants. However, there isn’t a Thai restaurant near us that truly wows us. So, trial and error has got us to a point where we no longer need to drive out to a good Thai restaurant, chez nous kitchen beckons instead! And the best part of most Thai curries is they are easy to whip up allowing me to get a delicious, filling and health dinner to the table in 30 mins or less. And you can make a one-pot meal by adding vegetables to the curry.

Servings: 4 Time: 20 minutes

Ingredients

  • 4 (6 oz) skinless tilapia fillets ( or vegetables like tofu, baby corn, bamboo shoots, if you want to keep this vegetarian)
  • 1 tbsp olive oil
  • 1/2 red onion, small, diced fine
  • 1 tbsp ginger, minced
  • 4 tbsp red curry paste ( or to taste, depending on the paste you use and spice level)
  • 1 15 oz can of unsweetened coconut milk
  • 1 tbsp fish sauce (if vegetarian, omit fish sauce and brown sugar, and add salt to taste)
  • 1 tbsp dark brown sugar
  • 1 cup carrots cut into matchsticks
  • 1/2 cup green peas
  • 1/4 cup cilantro or basil leaves, for garnish

Method:

  • In a large skillet, heat the olive oil. When oil is hot, add in the onions and ginger. Sauté for 2-3 minutes until the onions turn soft and translucent.
  • Add in the red curry paste and stir for 1-2 minutes
  • Add half of the coconut milk to the pan and stir in, until the coconut milk and the curry paste are well blended. When the milk starts to bubble, add in the remaining coconut milk. Stir well for a minute
  • Add in the fish sauce and brown sugar and bring the curry to a boil
  • Lower the flame, add in the carrots and green peas
  • Stir and then add in the fish
  • Cover and let cook on medium-low flame for 5-6 minutes until the fish is cooked through
  • Remove from flame and garnish with the cilantro/basil leaves
  • Serve with brown rice

Val Papdi – Flat Broad Beans

This Indian winter vegetable is long, flat with a slight curve. The pods are smooth, thick, and pale green, tapering at both ends. Each pod contains 2-4 seeds that are slightly flat. This vegetable is widely used in Indian cuisine and also in Chinese cooking. According to the site tarladalal.com, it is a low calorie, low carb vegetable that is good for weight loss. It’s packed with nutrients and can provide your daily intake of calcium, iron and magnesium. In the US, this bean can be found in the frozen section of an Indian grocery store. Here’s a recipe that is simple and flavorful and can be made in a jiffy when you want a side of greens for your meal.

Prep time: 5 minutes Cook time: 10 minutes

Servings: 4

Ingredients:

  • 1 tbsp olive oil
  • 1 12oz bag frozen val papdi
  • 1/2 tsp mustard seeds
  • 1/2 tsp cumin seeds
  • 1/4 tsp red chili flakes
  • 1 tsp garlic, chopped fine
  • 1 tbsp tamarind pulp (take a small ball of tamarind, add a few spoons of water to it, microwave for 1 minute and when warm to touch, squeeze out the pulp)
  • 1/4 cup shredded coconut (normal, not sweetened, can use frozen)
  • 1/4 tsp turmeric powder
  • salt to taste

Method:

  1. Heat oil in a frying pan. When oil is hot, add in the mustard and cumin seeds, let them splutter for a minute
  2. Add in the garlic and red chili flakes and let it sizzle for 1 minute
  3. Add in the val papdi, season with salt and turmeric powder, stir well
  4. Cover with a lid and let it cook in its own steam for 12 minutes
  5. Remove the lid and stir in the shredded coconut. Stir for 1-2 minutes
  6. Remove from flame. Serve with hot chapatis or as a side
Picture courtesy Tarladalal.com

Butter Chicken

Finger-licking Butter Chicken! The quintessential Indian dish that is found in New York, London, Sydney and often times, the smallest of Indian restaurants in points in between. Originating in the Indian sub-continent, it is a delicious, creamy, tomato-based curry with spice-infused chicken bites and can be as mild or spicy as you like. It’s simple and finger-licking good! Make it once and you’ll be making it again and again!

Marination:

  • 1 lb boneless chicken cut into bite size cubes
  • 3/4 tsp oil
  • 2 tsp ginger garlic paste
  • 1/2 tsp garam masala
  • 1 tsp cumin powder
  • 1 tsp coriander powder
  • 1/2 cup Greek Yogurt
  • 1/2 tsp red chili powder
  • 1/2 tsp red sweet paprika powder
  • 1 tbsp lemon juice
  • 1/4 tsp salt

Gravy:

  • 1/4 cup butter
  • 3 green cardamoms
  • 4 cloves
  • 1 cup red onion finely diced
  • 2 tbsp ginger – finely minced
  • 2 tbsp garlic – finely minced
  • 15 oz can tomato sauce
  • 20 cashew nuts
  • 1/4 cup milk
  • 1 tsp red chili powder
  • 3/4 tsp garam masala powder
  • 1/2 tsp coriander powder
  • 1/4 tbsp sugar
  • 1 tbsp kasuri methi (dried fenugreek leaves)
  • salt, to taste
  • 2 tbsp whipping cream

Method:

  1. Preparing the chicken:
    1. Marinate the chicken: In a Ziploc bag (or a container), mix all the ingredients mentioned under marination above with the exception of the chicken. When it is mixed well, add in the chicken and massage the marinate into the chicken. Cover/Close Ziploc and keep overnight in the fridge or 48 hours. The longer it rests, the more tender. I often buy chicken, cut it up and divide it between different marinades and freeze it for when needed
    2. Grill or cook the chicken:
      • In Air Fryer / Ninja Foodi: Pre-heat the Foodi with the basket for 5 minutes. Spray the basket with a little oil. Add the chicken pieces in a single layer making sure they aren’t touching. Spray the top of the chicken pieces with oil. Air Crisp on high for 360°F for 5 minutes. Then flip the pieces and continue on Air Crisp for another 3-5 minutes until the internal temperature is at least 165°F. Remove and place on a cooling rack/plate
      • On Stove Top: Add 1 tsp butter to a pan. When heated, add the chicken and marinade to the pan. Don’t overcrowd the chicken. Fry on high flame until liquid evaporates and chicken is cooked through.
  2. Prepare the gravy:
    • In a blender, make a smooth puree of the cashews and tomato paste and set aside
    • In a wide pan, heat the butter. Sauté the cardamom and clove till the cloves splutter and cardamom plumps up, and add in the onions
    • Sauté the onions for 2-3 minutes and add in the ginger and garlic. Continue to sauté the mix for 2-3 minutes on medium flame. The onions should be soft and translucent
    • Now add in the cashew, tomato puree and stir. Fry this mix on medium-low flame for 2-3 minutes
    • Add the chili powder, coriander powder, salt and sugar and continue to fry this mix until the puree starts to thicken and leave the sides of the vessel
    • Add the milk and continue to stir to form a gravy (Add more milk if a thinner consistency is desired)
    • Simmer for 4-5 minutes on a low flame
    • Add in the chicken and simmer for 4-5 minutes
    • Add in the garam masala and the kasuri methi and stir. Simmer for 2-3 minutes
    • Switch off the stove and pour in the cream and let it rest. No need to stir it in
    • Garnish with coriander leaves and serve hot with naan or rice
Grilled chicken pieces

Delicious, easy Mussels

This mussels recipe is an all time favorite. When you have guests over, it’s a quick, delicious and elegant-looking dish that’s inexpensive to serve up. Add in a side of garlic bread to sop up that oooh, so delicious broth! A perfect meal for a weeknight dinner, or a date night in or when guests stop by.

Servings: 6

Ingredients:

  • 3 lbs black mussels
  • 3 tbsp extra virgin olive oil
  • 1 large red onion, finely chopped
  • 5 large garlic cloves, minced
  • 1 14-oz can of diced tomatoes
  • 1/2 tsp black pepper powder
  • 1 tsp dried red pepper flakes (or 1/2 if less spicy desired)
  • 1.5 cups dry, white wine
  • 1/2 tsp sugar
  • 4 tbsp parsley, chopped
  • 1/2 tsp dried oregano
  • 2 tsp fresh lemon juice
  • salt, to taste
  • large pinch of Spanish saffron

Method:

  1. Clean the mussels – Inspect each one carefully and discard any that are broken or if partially open, tap the shell and if it doesn’t close, discard. In a bowl, rinse the remaining mussels with cold water, replacing the water 3-4 times. If the mussels have beards, the hairy thing at the end of the mussels, snip it off
  2. In a large vessel with lid, heat 2 tbsp olive oil
  3. When hot, add in the red onion and garlic. Stir on medium flame for about 5 minutes until the onion is soft and translucent
  4. Add in the tomatoes, pepper powder, red pepper flakes, sugar and salt. Stir for 3-4 minutes
  5. Add in the wine and bring to a boil
  6. Add the mussels, cover and steam for 3 minutes
  7. Remove the lid and stir gently, so that the mussels are heated evenly. Cover and continue to steam for 3 minutes
  8. Stir in the parsley, oregano, lemon juice, and saffron. Adjust seasoning to taste
  9. Serve right away in a bowl with a side of garlic bread or any crusty bread to soak up the broth

Burmese Khao Suey

A curried noodle soup in an aromatic coconut milk broth combined with chicken, and varied condiments make for one hearty and comforting meal! If there’s one food the kids want when they go to Aunty Marilyn’s house is this delicious Khao Suey. This dish is said to have originated in Burma, now called Myanmar, and is said to have come to East India with people who migrated during World War II. It is widely served in Myanmar, Laos, and Norther Thailand. The dish has a few different versions and is also spelled differently like khaosay, khao soi, etc. If you like Indian or Thai food, you will enjoy this dish.

Guidance:

  • Protein Option: This dish tastes amazing with boneless chicken but  I used bone-in chicken thighs to get the richness that comes from cooking meat with bones. You can also add tofu, carrots and other vegetables for a vegetarian version
  • Noodles option: Egg noodles are typically served with khao soi but I have used angel hair noodles and also ramen, and they worked great
  • Speed-to-table: You can use store bought fried garlic and fried onions
  • Condiments: Condiments amp up the flavor. Fried garlic, fried onion, roasted peanuts, lemon wedges, and cilantro are the most popular accompaniments. Sliced boiled eggs, jalapenos, finely sliced red onions, and green onions are other options

Servings: 4

Prep time: 10 minutes Cook time: 20-35 minutes (depending on using the pressure cooker/stove top and boneless or bone-in chicken thighs)

Ingredients:

  • 2 tbsp sesame oil
  • 2 cups red onions finely chopped
  • 2 tbsp garlic minced
  • 1 tbsp ginger minced
  • 1 tsp red chili powder
  • 2 tsp coriander powder
  • 1 tsp turmeric powder
  • 2 lbs bone-in, skinless chicken thighs (if using boneless chicken, cut into bite size cubes)
  • 1 can (14oz) coconut milk
  • 3 tsp fish sauce
  • 1 tsp soya sauce
  • 3 cups chicken broth
  • 3 tbsp gram flour
  • 1/4 cup cold water
  • 8oz noodles – angel hair pasta

For garnishes:

  • 1 cup finely chopped cilantro
  • 1/2 cup roasted peanuts
  • 5 garlic cloves, cut into fine slices
  • 3 inches ginger, cut into fine long slices
  • 2 limes cut into wedges
  • 4 eggs boiled and cut into quarters
  • 2 spring onions chopped finely
  • 1 cup fried onions or 1 large red onion cut into fine, long slices and
  • 1 tbsp oil if preparing the fried onions and garlic at home

Method – Ninja Foodi / Instant Pot:

  1. Pre-heat the Ninja Food/ Instant Pot by selecting the Sauté function
  2. Add the sesame oil. When hot, add the onions, garlic and ginger, sautéing it, until the onions are soft and translucent – about 4-6 minutes
  3. Stir in the coriander powder, red chili powder and turmeric. Stir for about a minute
  4. Add in the chicken and lightly fry it, stirring for about a minute
  5. Add in the coconut milk, fish sauce, soya sauce, and the broth. Stir for a minute
  6. Now cancel the Sauté option and turn on the Pressure Cook option
  7. Close and Pressure Cook for 10 minutes. If using boneless chicken, pressure cook for 3 minutes
  8. While chicken is cooking, make the noodles, following the instructions on the noodles box. Prepare noodles and keep aside
  9. In parallel, while the soup is cooking, prepare the fried onion and friend garlic garnishes: In a pan, heat the 1 tbsp oil and fry the garlic until crisp and golden on very low flame. Remove and set aside. Add the onions to the pan, fry until crisp and golden. Remove and set aside
  10. Take a bowl and mix in the gram flour and water to create a fine paste, removing any lumps
  11. When time is up for the chicken, release the pressure, remove lid and turn back the sauté option. Stir in the gram flour mix to thicken up the soup, cooking for 1 minute
  12. Serve in bowls, squeeze in lime juice and add your choice of garnishes

Method – Stove Top:

  1. In a medium saucepan, add the sesame oil. When hot, add the onions, garlic and ginger, sautéing it, until the onions are soft and translucent – about 4-6 minutes
  2. Stir in the coriander powder, red chili powder and turmeric. Stir for about a minute
  3. Add in the chicken and lightly fry it, stirring for about 2-3 minutes
  4. Add in the coconut milk, fish sauce, soya sauce, and the broth. Simmer for 5 minutes if using boneless chicken cubes or for 30 minutes (covered) if using bone-in skinless chicken thighs
  5. While the chicken is cooking, cook the noodles following the recipe on the noodle box, until al dente
  6. In parallel, while the soup is cooking, prepare the fried onion and friend garlic garnishes: In a pan, heat the 1 tbsp oil and fry the garlic until crisp and golden. Remove and set aside. Add the thinly sliced onions to the pan and fry until crisp. Remove and set aside
  7. Take a bowl and mix in the gram flour and water to create a fine paste, removing any lumps
  8. When the soup is ready, stir in the gram flour mix to thicken up the soup, cooking for 1 minute
  9. Serve in bowls, squeeze in lime juice and add your choice of garnishes

Vegan African Chickpea, Spinach, Sweet Potato and Peanut Stew

This chickpea, spinach and sweet-potato stew is a soothing, African-inspired, gluten-free and vegan dish that is oh so delicious and comforting served with plain white rice! Seasoned with spices and a rich tomato broth that is made creamy with peanut butter, it’s oozing with goodness and you won’t even notice there’s no meat in this dish. I took this dish to a pot-luck and made it for parties at home and each time, guests loved it and asked for the recipe.

This recipe has instructions for making this on the stove, a slow cooker or the Instant Pot.

Prep Time: 15 minutes Cook Time: 4 hours Total Time: 4 hours 15 minutes  Servings: 6 servings

Ingredients

  • 1 tbsp olive oil
  • 5 cloves garlic, minced
  • 1 tbsp ginger, finely chopped
  • 2 small yellow onions, diced
  • 2 medium-sized sweet potatoes, diced into 1/2 inch cubes
  • 1 tbsp curry powder
  • 1 tsp cumin
  • 1 tsp red chili powder
  • 1 tsp salt
  • 2 cups vegetable broth
  • 1/3 cup peanut butter (smooth or chunky but make sure it’s natural and no sugar added)
  • 1 28oz can crushed tomatoes
  • 1 can chickpeas, drained and rinsed (alternatively, soak 3/4 cup chickpeas overnight and pressure cook for 15 minutes)
  • 1 red pepper, chopped
  • 2 cups spinach, chopped (alternatively, collard greens or kale also work well)
  • salt, optional and as desired
  • 1/4 cup chopped peanuts (for garnish)
  • 1/2 cup chopped cilantro (for garnish)
  • 3 cups cooked basmati rice (optional side)

Method:

  • Slow cooker:
    • Add all ingredients to slow cooker except for spinach, red pepper, cilantro, peanuts and rice. Cook on high for 4 hours, or low for 8 hours
    • When ready, stir in spinach and red pepper and cover
    • Serve in a bowl with rice and top each bowl with peanuts and cilantro
  • Instant Pot:
    • Add all ingredients to Instant Pot except for spinach, red pepper, cilantro, peanuts and rice
    • Cook on high pressure for 2 minutes and then do a quick release of the pressure
    • Remove lid, and stir in red pepper and spinach
    • Serve in a bowl with rice and top each bowl with peanuts and cilantro
  • Stove top:
    • Heat the olive oil in a large pot
    • Sauté the onion, garlic and ginger over medium heat for 2-3 minutes, or or until the onion becomes soft and translucent
    • While the onion, ginger, and garlic are sautéing, peel and dice the sweet potato into 1/2-inch cubes. Add the sweet potato cubes, curry powder, red chili powder, and cumin powder to the pot and continue to sauté for about 5 minutes
    • Add the crushed tomato, peanut butter, chick peas, and vegetable broth to the pot. Stir until the peanut butter and tomato paste have mostly dissolved into the broth. Place a lid on the pot and turn the heat down to medium-low and allow it to simmer for 15-20 minutes, or until the sweet potatoes are very soft
    • While the sauce is simmering, wash and then cut the spinach into 2 inch wide strips
    • Once the sauce has simmered for 15-20 minutes and the sweet potatoes are very soft, stir in the spinach and red pepper
    • Finally, taste the sauce and add salt, if desired
    • Serve in a bowl with rice and top each bowl with peanuts and cilantro

Slow roasted pork butt with spicy mustard sauce

Our friend, Prem, is passionate about cooking. And the love and the intensity that goes into every recipe is evidenced in the flavors of everything he cooks. From finding the right cuts of meat, to the freshest of ingredients, and to not taking shortcuts, each dish is a culinary journey. Sometimes though the simplicity of a dish in itself amazes….and this slow roasted pork butt dish does just that. It’s simple, and yet, oozes with flavor. Try it and your guests will be raving about it, just as we did when we first tried it.

Serves: 8-12     Time: 6-7.5 hours plus brining overnight and 1 hour rest time

Ingredients:

  • For the Pork Butt
  • 1 Bone-in pork butt, 6 to 8 pounds
  • 1/3 cup salt
  • 1/3 cup dark brown sugar
  • 4 tbsp black pepper
  • For the Spicy Mustard Sauce
  • 1/3 cup apple cider vinegar
  • 1/4 cup dark brown sugar
  • 2/3 cup Dijon mustard
  • 2 tbsp hot sauce
  • 1 tsp Worcestershire sauce

Method for the Pork

  1. Using a sharp knife, cut cross lines  1 inch apart into the fat cap being careful not to cut into the meat
  2. Rub the salt, pepper and brown sugar all over the meat including over the slits
  3. Wrap the port tightly with plastic wrap, and refrigerate over night
  4. Heat oven to 325 degrees Fahrenheit
  5. Take a roasting pan and fill with 5 cups of water
  6. Place a rack over the water and spray with nonstick cooking spray
  7. Unwrap pork from plastic, and place on the rack
  8. Place pan and meat on the lowest rack in the over
  9. Cook meat, basting on the hour with the juices from the pan
  10. Cook 5-6 hours until thermometer inserted into the meat registers 190 degrees without the thermometer touching the bone
  11. Transfer the roast to a carving board, and let is rest for an hour, covered loosely with a tent of Aluminum foil
  12. Transfer liquid to a fat separator and let stand for 5 minutes. Throw out the fat and use the au jus while serving
  13. Serve with spicy mustard sauce

Method for the spicy mustard sauce:
1. Whisk together all the ingredients in a bowl and set aside

Serving suggestion: Carve the pork roast and serve with a drizzle of au jus and spicy mustard sauce.


Moong dal Kichdi

Comfort food! We’re in quarantine unfortunately, and my mind immediately went to the foods my mom would make to help our bodies heal and to boost immunity. Kichdi, a rice and lentil porridge, is one of those foods. A simple and quick one-pot dish that nourishes your body. Protein-packed, it’s a soothing Indian meal that’s perfect for someone under the weather (and even when you’re not)! I make this in the Ninja Foodi but it can be made in the Instant Pot or a Pressure Cooker.

Prep Time: 10 minutes Cook Time: 25 minutes Total time: 40 mins

Servings: 4

Ingredients:

  • 1 tbsp Ghee (or oil, for a vegan recipe)
  • 1/2 cup Basmati rice
  • 1/2 cup small whole green moong dal (or small yellow moong dal lentils)
  • 1/4 teaspoon turmeric powder
  • 1 Bay leaf
  • 1/2 teaspoon cumin seeds
  • 1/2 teaspoon mustard seeds
  • 1 teaspoon finely chopped ginger
  • 1 medium green chili finely chopped
  • 1 large tomato diced
  • Salt to taste

Method:

  1. Soak the basmati rice and moong dal in cold water for 15-30 minutes. Drain, rinse and set aside.
  2. Set the Ninja Foodi/ Instant Pot to sear option
  3. Add the 1 tbsp Ghee and when hot, add the bay leaf, cumin seeds, mustard seeds, ginger and green chili
  4. Stir for a minute, and then add the diced tomato
  5. Stir for a minute and add the rice and dal along with 3 cups of water, turmeric powder and salt
  6. Secure the lid, select the pressure cook option, close the pressure valve and cook for 15 minutes at high pressure (12 minutes if using yellow moong lentils instead of the small whole green ones)
  7. When done, slow release for 20 minutes and open lid to release pressure
  8. Serve with a tsp of ghee